Hi, I’m David Young – an Advanced PGA Teaching Professional – welcome to my channel! This YouTube channel is designed to help develop the skill of golf and how to focus the mind’s role in golf.
I specialise in mind and on-course lessons as well as golf tips to help you improve your game.
Whether you’re just starting out on your golf journey or you’re a seasoned pro looking to fine-tune your game, I’m confident that I can help you get to where you want to be. So, if you’re looking to improve your golfing skills in a fun, engaging, and supportive environment, look no further than me!
Join this channel to get access to perks:
https://www.youtube.com/channel/UCLKZieMZJTc7xbSTYxpF3gA/join
🔗 Affiliate Links (if you use my link, I will earn a small commission, thank you for your continued support):
Amazon Storefront – https://www.amazon.co.uk/shop/theresourcefulcoach
Red Tiger Range Finder (Ad/Gifted) – https://amzn.to/3S1XQjK
Every Shot Counts, Mark Broadie – https://amzn.to/3QquY3Z
Golf Sequin Swing Mat – https://amzn.to/4b7ApOP
Garmin R10 Launch Monitor – https://amzn.to/3X2oVq6
Titleist Pro V1 Balls – https://amzn.to/3QhdEyb
Bushnell Rangefinder – https://amzn.to/4hUmgqo
Callaway Alignment Sticks – https://amzn.to/3EOA33B
Golf Impact Bag – https://amzn.to/3DnQzHp
Callaway Supersoft Balls – https://amzn.to/4j6jfUK
Golf Grips I Use – https://amzn.to/3HLWfNa
Follow me:
Instagram: https://www.instagram.com/theresourcefulcoach/
Website: https://theresourcefulcoach.co.uk/
Facebook Page: https://www.facebook.com/share/15fab2J99F/?mibextid=wwXIfr
Contact me:
theresourcefulcoach@gmail.com
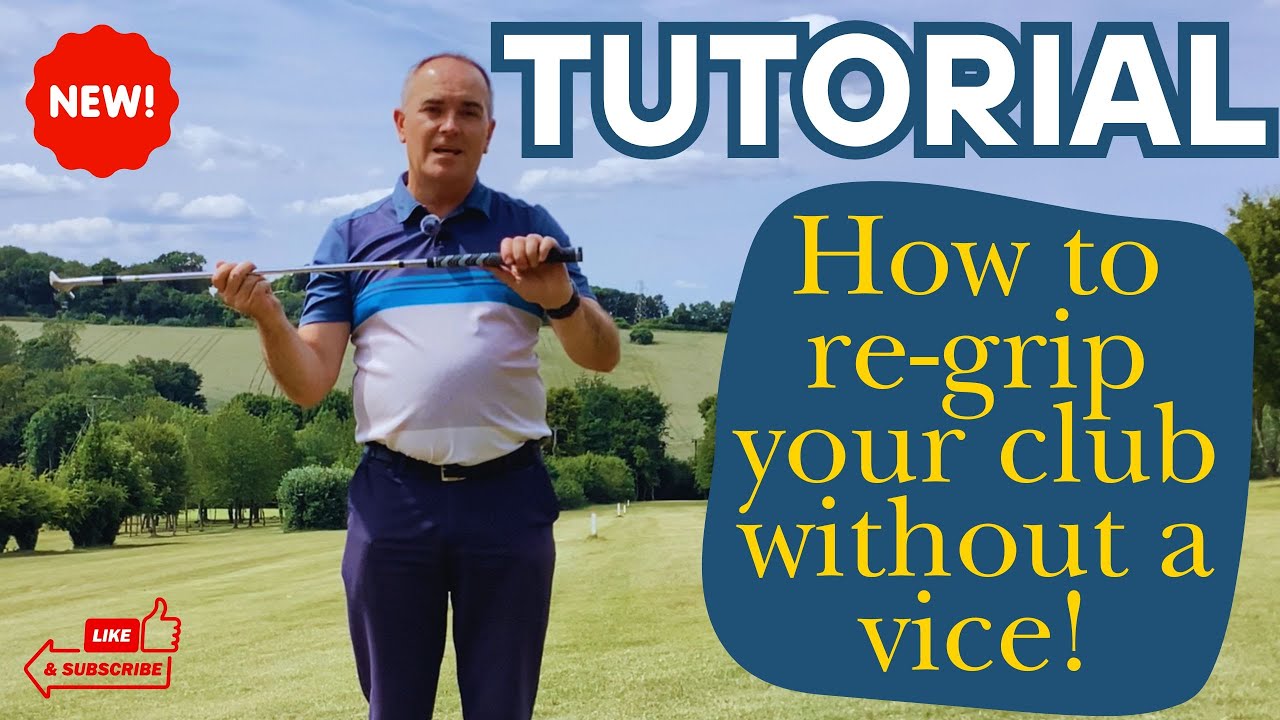
[Music] hi there it’s David Jun the resourceful coach and what we’re going to talk a little bit about today we’re going to talk a little bit more about your equipment and making sure you’re keeping your equipment in good shape making it easier for you to play golf well and we’re going to talk about regripping your clubs so one of the things I see quite a common thing with with golf people’s golf clubs is the grips get a little bit shiny and they need to be replaced reasonably regularly depends how much you’re playing um but what we’re going to show you today is a way that you can do it without having to go maybe to your golf pro or somebody to replace them for you you can do them yourself and you don’t even need a vice to do this so we’re going to show you how to do that now great thing with grips you can go online to some of these big companies and you can buy probably a set of 13 grips for around about 5060 pounds and within that sort of package that you buy you will get the 13 grips you will get tapes to put underneath so put the grip on correctly you will get a um Stanley knife so you can cut the grips off and you will also get the fluid that you need to use to get it on which dries very quickly and if you do it you’ll probably be able to use the club within an hour of using it it’s that quick nowadays okay so that’s what we’re going to look at today we’re going to go through it stage by stage so you do it correctly and the most important thing do it nice and safely at the end of it you’ve now got your golf clubs regist so first thing to look at is we got to get the old grip off okay and as we said just down here I’ve got all the bits that I need and we’ve got our Stanley knife and first thing there just take it nice and easily with this just go to the base of the grip and just start to cut it take it up the grip until you’ve gone to the end let’s get rid of that put that back down and now just you can just pull that off very very easily okay so that grip’s coming off nicely and what you’ll have now on your grip let’s get rid of that or on the club is you’ll have the old tape okay and it might take a little time there to get rid of that if you want to get rid of you want to keep the same thickness what I’m actually going to do and if you go and have your grips regrip somewhere or you might want to do this yourself if you want to make the grip slightly thicker without buying a bigger grip you might leave the tape underneath so I’m just going to leave that on underneath because I just want it one tape thicker but here’s a key thing you need to do let’s get the Stanley knife back okay and we’re just going to look at the end of the club here okay and you can see the old tape there and quite a common thing I hear with people’s clubs is when they’re playing a shot you can hear something rattling down the shaft and the likelihood is it’s probably the old tape okay so I’m just going to take the Stanley knife i’m just going to cut that out and get rid of that okay so that’s gone and most important then when I’ve done that is we’re just going to tap that on the ground and just get rid of any of that sort of loose stuff that could be in there to get rid of that out the shaft so just give it a tap if there is any tape in there any of that old tape you can physically get that out and then you won’t get that annoying sound where it sounds like it’s running down the shaft of the club and being annoying when you’re playing your shots that may be the reason why that’s happening so definitely do that that’s really important okay so that’s our sort of first thing that we’ve done we’ve removed that grip we’ve given ourselves chance now to now start to put the new grip on so step two what we’re going to do now we’re going to put the tape on the the double-sided tape so then we can put the grip over the top and there’s our grip put onto our new club and this is always the bit I find the fiddliest bit what we’re going to show you to start with it’s really important when you apply this double-sided tape is we want let’s just do it back here first let’s just get it onto it there want around about see how it’s fiddly because it’s double-sided tape okay so what I’ve done there as you can see I’ll just bring it up to the camera just probably put about three or four millimeters you can go a little bit more five six millimeters of tape over the top of the grip and that’s really important we’ll do let’s get this on to the grip why that’s important is if you have that over the top in a minute when we put the grip on we’re going to slide it over the top of the club okay so if I put that literally bang on where the top of the shaft is what’s going to happen is you’re going to try and push it on against the sort of the the harsh steel of the shaft by doing what we’ve done here and got it into that position what it starts to do then you’ve got that little bit of the smoothness of the tape that when you put the uh the fluid on it will slide on a lot easier okay told you this was the fiddly bit there’s the double-sided tape now I’ve kept that tape on as I said earlier because I want to just slightly thicken up my grip okay you can take that tape off if you wish if you want it to be the same but I want it a little bit thicker so I’ve left that on there so that’s that done let’s just put that somewhere safe that doesn’t go flying away let’s put that in my pocket and if we bring that up all I’m going to do now just bring it up to the camera just turn that in nicely into there so in a second when I start to put the grip on we’ve now got that stickiness of that bit but it will slide onto the grip the grip will slide so much easier onto the shaft of the club so that’s stage two we’ve got the tape on now what we need to do stage three is get the grip on and get it lined up correctly so when you go and play you’re going to have a good grip and you’re going to find it a lot easier to get the results that you want so we’re now on to stage three and that’s putting the grip onto the golf club and making sure it’s positioned correctly and first thing I’m going to look at I’m just going to come up to the camera show you the grip itself and on all grips what you’ll tend to find is they’ll have a little white mark at the bottom a little mark at the bottom little mark at the top and you might think what are those for well they’re there for the guys putting the the grip onto the correctly so by positioning those in line with the leading edge of the club the leading edge being this front edge of the golf club here it allows you now to make sure that all your grips are on correctly so it’s a really key thing if you get your grips done somewhere else is make sure when you pick them up those lines are in the right position the last thing you want is that grip to be at the wrong angle when it goes onto the club a lot of grips will have a little bit of a ridge down the back so if that’s sitting incorrectly it might feel a bit strange in your fingers okay so that’s why when you look at your grips that’s why you’ve got those two dots some of them have them on the back as well it just depends on the manufacturer of the of the grip okay so our job now is how do we get that onto the club so we’ve got a little pot here which we’re going to use in a minute which we’re going to pour some fluid onto the um the uh the double-sided tape that’s going to catch all that so we don’t make a mess on the ground and we’ve got our fluid here in our our little bottle here and what’s really important is when you look at a grip you’ve got two holes basically on your grip you got the end here which is obvious that’s the bit we’re going to push onto the club but you also have a hole at the end of the grip and that’s there for us when we put the grip on air gets into that and it’s easy to push on if that was solid it would keep pushing it off okay so here’s the most important thing when you start we’re going to put this fluid in the grip if we don’t cover that hole up the fluid will just come out the other end and we’re going to waste it so first things first cover that hole up second thing here’s our fluid we’re going to pour that now into the grip make sure there’s plenty in there done that and what we’re looking to do now when we use the fluid is we want there to be plenty of fluid in the grip itself and plenty on the double-sided tape so what I’m going to do I’m going to cover the other end up so no flu can come out i’m just going to literally turn it upside down and back do that a couple of times and now that inside is completely covered by that second thing now I’m going to put the end of the club in the pot so that’s going to catch all the water and I’m going to pour that down out of the end of the grip onto the tape and now we’ve got two ways that that’s going to slide on really easily so now what I’m going to do I’m going to line the club up just under my foot where I think the leading edge is and I’m now going to take a little bit of time to get that dot in the correct position so I think that’s correct so that going to slide that on just push it straight down you can see how easy that went on and that’s because we got the fluid in the right position now you got a little bit of time here don’t panic don’t rush this but I can see as I look at that and I look at the leading edge on the ground the two dots are just slightly too much round to the left only missed it by a couple of millimeters but it’s slightly off so just take a little bit of time just to bring the grip round and make sure that’s in the correct position it might take two or three goes okay you might turn it straight away and it’s perfect so I look at that still got to go a little bit more and that’s okay take a little bit of time okay just get that into the right position that looks a bit better double check that down at the bottom and what you’ll normally have also on the top will be the manufacturer’s name and if that doesn’t look quite right make sure you get that in the right position as well so that now looks pretty good top of the club there looks nicely in line go down the grip make sure that all looks nice and straight so as I look down at that now that looks great and so the grip’s on the club okay that’s really important now I just want to clean it up so I’ve got a towel here just going to use that fluid that’s in the pot just dab that in there and I’m just going to clean the shaft nicely sometimes what you get from the tape when you push it on you get a little bit it looks a bit gunky it sort of goes down it turns into a bit more of a a sort of a paste and it can go down the shaft and it can be quite sticky so now by doing that that’s got rid of it that club is ready okay so now I’ve got that done i’m ready to go get back out on the golf course so hopefully what you’ve seen today through those three simple steps of removing the grip applying the tape and then putting the grip on shows you how you can actually sort your own grips out you don’t need to go to the club pro as I said you can purchase a good set of grips for around about 5560 around that price do it yourself and you’re out there ready to go but the most important thing if you don’t feel confident to do it yourself get your pro to do it but keep those grips in a good state if they are getting a bit slippery you may be grabbing that grip that may be causing you to have too much grip pressure causing the swing not to work the way you want so it’s a part of our four resources the equipment get it in the right way here get the grips good and it’s only giving you a better chance i hope you’ve enjoyed that video today a little bit different to my normal videos but again it’s important to get your game as good as we can get it if you have enjoyed it share it with your friends subscribe to the channel and I look forward to seeing you soon [Music] hey



6 Comments
Great video, thank you.
Thanks david. Learning many things from you.
David, great video to simplify regripping my clubs. How best to removed old grip tape if I don’t wish to thicken my grip? Does the solvent loosen the tape easier? Secondly, any difference between regripping irons, hybrids, and woods? Cheers!
You add value with every video.
Keep it in the short grass.
great video! thanks very much….
Really good instruction thank you 👍👏