
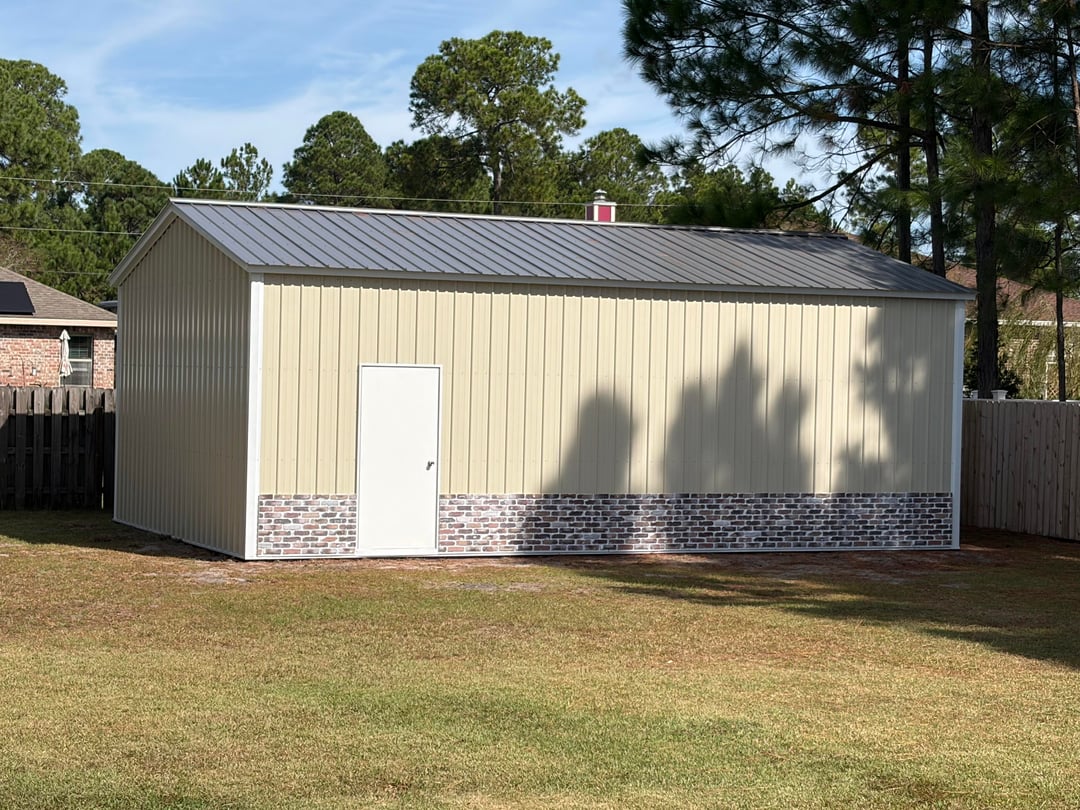
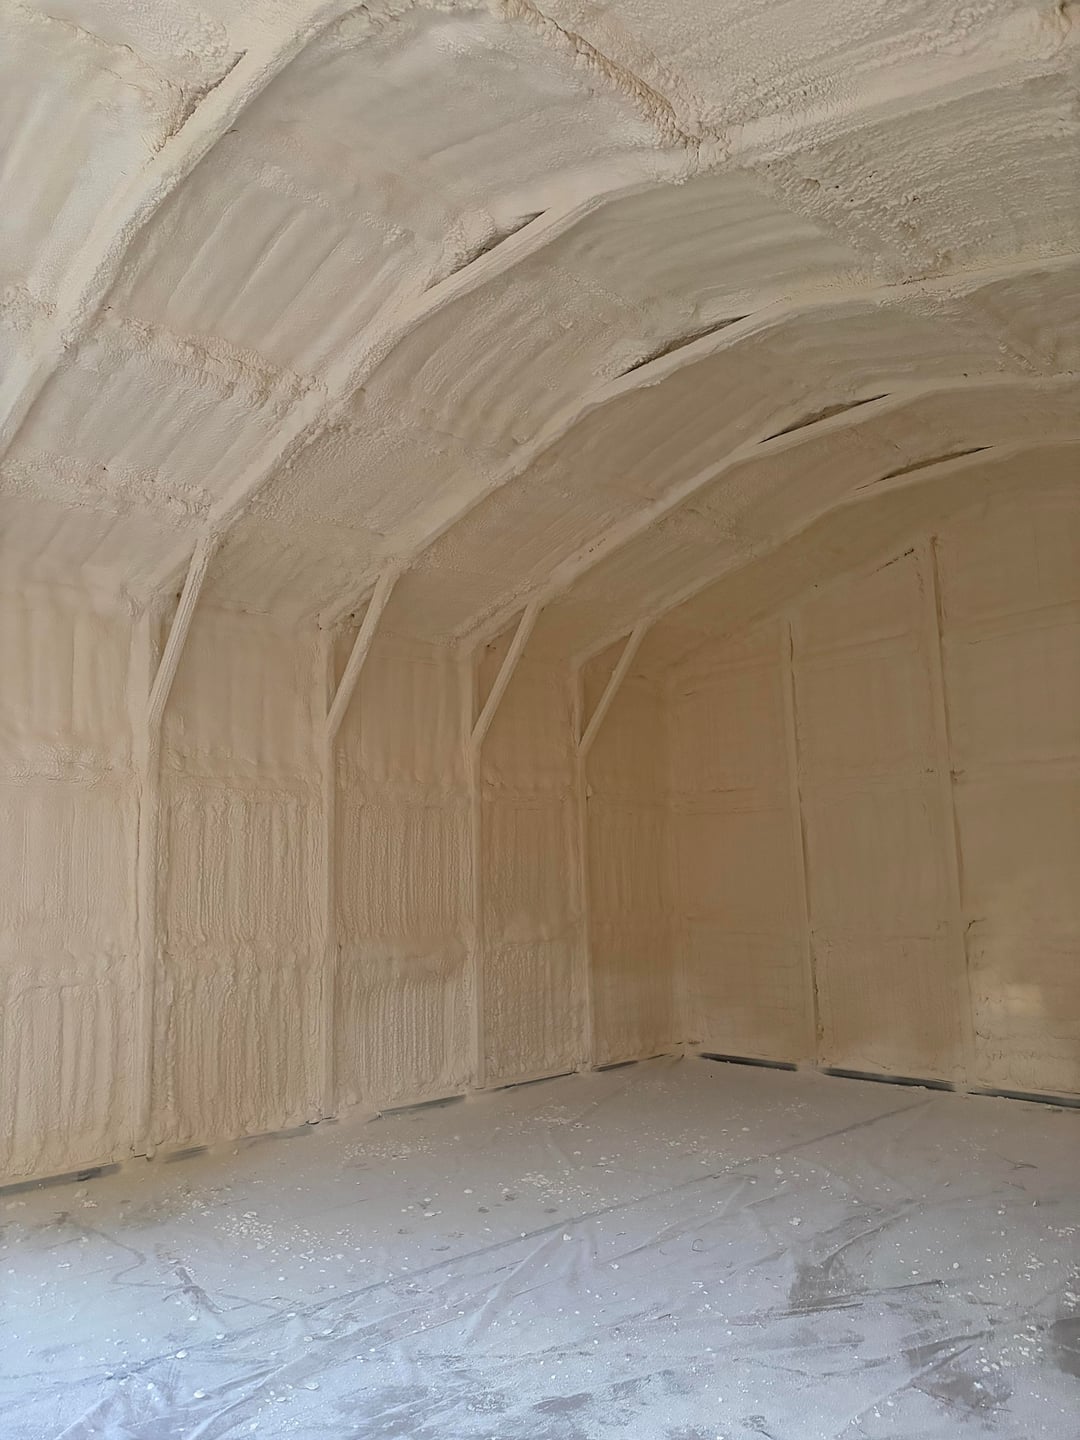
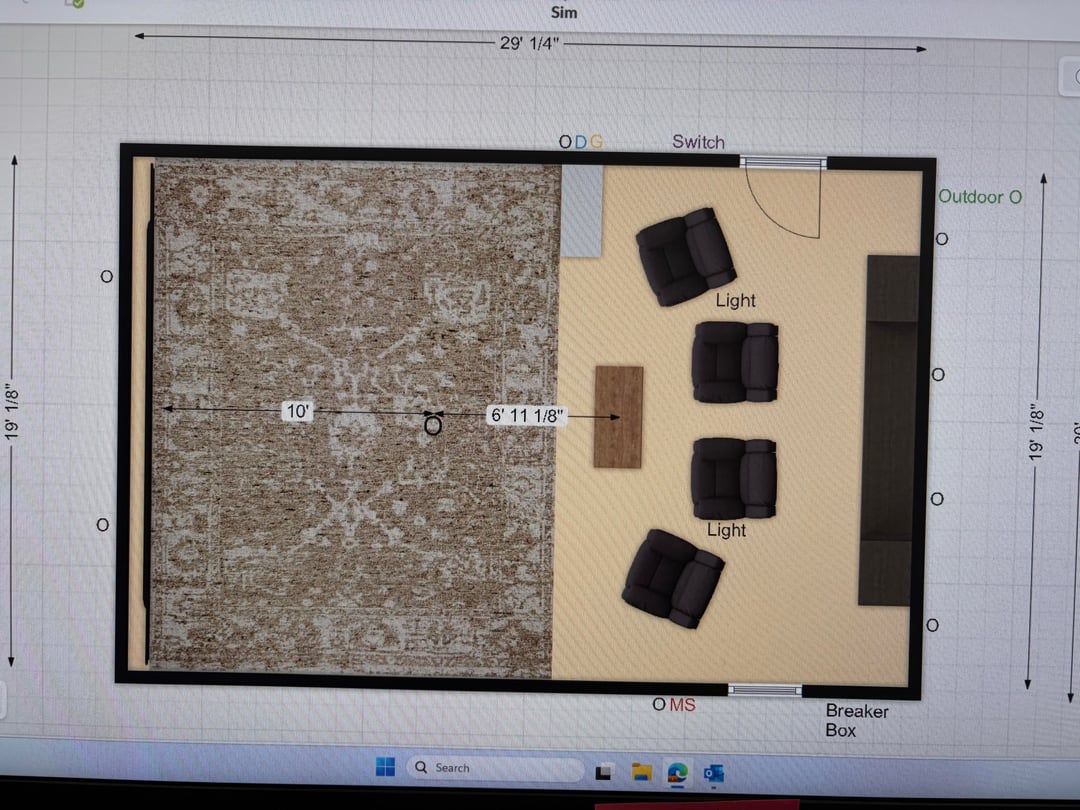
I’ve built a 20’x30’ metal building that will have a golf sim inside. I will add walls, and I plan on having the 10’ on either side of the screen to be plywood so mounting padding will be easier. (The rug in the 3rd pic will be turf, so the walls on either side of that.) I’m having a hard time deciding how to go about padding the walls for bounceback reduction. I bought acoustic tiles that are .4” thick and they can withstand a golf shot, but the bounceback is pretty noticeable (I tested a few tiles on a piece of plywood by smacking some 5 iron shots into it). The golf sim sites have padding options but they’re so expensive. Does anyone have any ideas of how to go about padding without breaking the bank? Does anyone think I should just go with the acoustic tiles and call it a day? Any insight will be appreciated!
by AutoLoss4u


7 Comments
The only way to prevent bounce back is for the surface to “give” a little to absorb the energy, preventing the bounce back
A lot of folks go with weighted curtains as they are great for catching balls and preventing bounce back
https://a.co/d/cBWaaMN
Here’s the acoustic tiles I bought to try out
You’re prob better off using heavy curtain and prob gonna be less expensive with a better look.
What software are you running in that last picture?
I think side walls that bounce are fine, as long as they bounce toward the screen, and not back at you.
https://preview.redd.it/0t9dqkaa03yf1.jpeg?width=2000&format=pjpg&auto=webp&s=995f6d3f0cc4d42cf10d54f98c4aa3401514cc4e
The side walls won’t take a direct shot, they’ll be hosel and toe shots hitting at an angle. So long as the padding absorbs energy and directs the shots in a safe direction they’ll work if you like the appearance.
Much more important is the padding around the screen that can send a ball ricocheting back dangerously.
The aesthetic is important in my opinion, and the sound dampening performance is too.
I made my own, it was relatively simple. 1/4” plywood, memory foam mattress topper, batting, duck cloth, spray adhesive, staples, and mounts.
It took me about 12 hours over two days to make.
[Memory Foam](https://www.walmart.com/ip/CONCETTA-2-Inch-Foam-Mattress-Topper-CertiPUR-US-Certified-Full/1137619811)
[Spray Adhesive](https://www.walmart.com/ip/Gorilla-Glue-HD-Contact-Adhesive-Spray-12-2oz-Can-Recommended-Surface-Hardware/1553621013)
[Duck Cloth](https://fabricwholesaledirect.com/products/10-oz-cotton-duck-canvas-58-60-inch-fabric)
Take your plywood and put it on saw horses.
Lay memory foam on top of the plywood
Align any edges.
Uses an electric carving knife held perpendicular to the floor, following the edges of the plywood.
Cut duck cloth and batting 7” longer and wider than the plywood dimensions.
Apply spray adhesive to one side of both plywood and foam.
Attach glued sides of foam and plywood together.
Apply spray adhesive to the foam and one side of the batting.
Apply the glued side of the foam and batting.
Spread out the duck cloth, best side down, on a clean surface.
Place the plywood/foam/batting assembly in the center of the duck cloth.
Fold the duck cloth over the plywood/foam/batting assembly, gently pull and staple in place.
I stapled long sides first with just enough tension to remove wrinkles, too much tension increases bounce back.
I experimented with different end/corner folds and ended up with modified “hospital corners” removing excess batting in the corners.
They turned out great. I attached them to a partition wall I built using [magnets](https://a.co/d/5n8hj2q) attached to the panels and nailing plates on the partition walls. They are rock solid but easily removable.