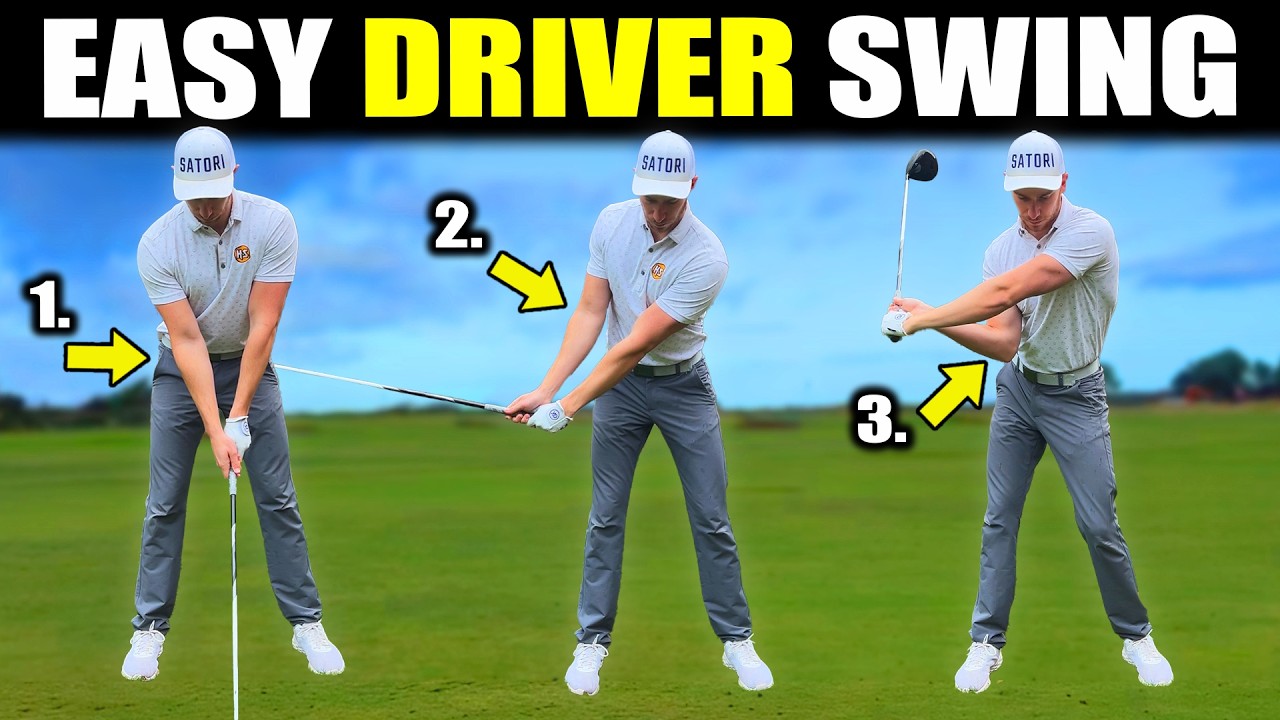
An effortless driver golf swing starts long before impact, it begins with how you set your arms at address. In this video, Harry Shaw reveals the simple technique that keeps your arms connected throughout the swing, helping you create that smooth, powerful, and repeatable motion you see in the pros.
*
CHAPTERS
00:00 Intro
00:54 Setup
04:01 Backswing
07:18 Downswing
09:23 Recap
*
My Links 👉 https://linktr.ee/HarryShawGolf
*
The Connection Band 👉 https://finalputt.com/products/connection-arm-band?bg_ref=K5yWWYzRE6
*
The Course Management Guide 2.0 👉
https://harryshawgolf.kit.com/products/thecourseguide
*
Online Lessons 👉 https://harryshawgolf.com/
*
In-Person Lessons 👉 https://harryshawgolf.com/
*
Share This Video 👉 https://youtu.be/FHFdgD0qeHU
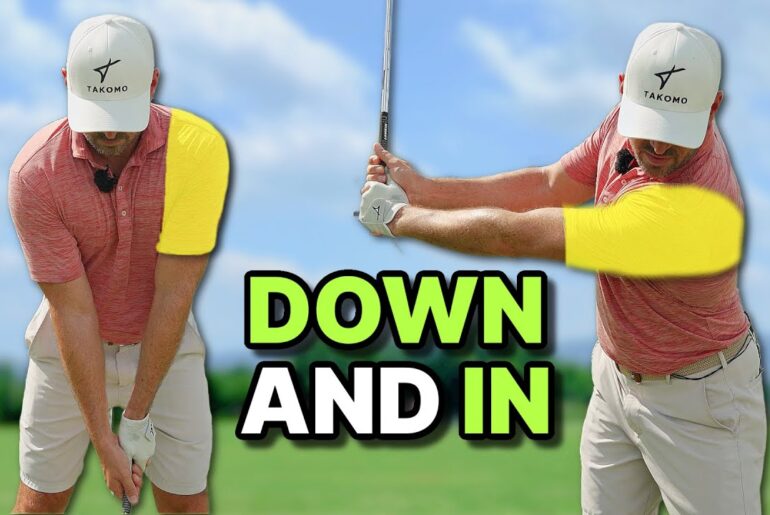
The best players in the world always seem to look like they have their driver well under control. And this is one of the keys that gives them a smooth and connected golf swing. Now, when students come and see me for lessons and they would struggle to get their arms very much so connected with the driver swing, I’d usually notice this from the get-go, the actual setup position. Then from there, they get their arms into all sorts of random positions during the back swing, down swing, which makes it so much harder for them and probably you as well. if you can relate to this to hit straighter and also longer T-shots. We’re going to be breaking this down into three different bits. First one, we’re going to be talking about the setup. All things set up with the arms and how we should keep them connected. Second thing, we’re going to be looking at the back swing. Final part is all to do with the down swing. And then that works us all the way through to the finish. So, let’s kick things off with the actual setup. So the lead arm, I want you to think of the lead arm during your golf swing. Whether you’re using a driver or irons, this applies to both. The lead arm is there to guide the golf club during the golf swing. And the trail arm is there to set the club into the positions required. So the lead arm to get the lead arm set into the correct position at the address, all you have to do is simply allow your entire arm just to relax. to relax in a way that just allows the hand to fall, flop, whatever it feels like to you, just to relax the entire arm. Now, you’ll notice when this happens that two things take place. The actual glove logo itself faces away from us and the palm tends to face towards us. Now, this position of the arm here is perfect for how we place this hand onto the golf club and how this arm should naturally be positioned for a connected and reliable golf swing. So, that right there where we see the bot end of the elbow facing on almost an angle in between these two camera angles here and the elbow itself facing towards the left corner of the screen is pretty much perfect. And this just makes it easy for us to then guide the club all the way up to the top of the golf swing correctly as we make our way down. Allows to get the correct amount of release to hit the golf ball with a square club face. Now, when it comes to all things the trail arm, the trail arm works a little bit differently. When I mentioned before about players getting into random positions during their back swing and down swing, this was usually caused by this trail arm. The reason being that if we had the trail arm set in a way that allows the elbow to face away from the body here during the takeaway, this would look pretty decent. But then from there, we’d have to fold this way and we get this very much so flared out position. Have to react during the down swing to conjure up something last minute. So rather than having the elbow, what I tend to see the elbow facing away from the body where we get this internal rotation of the trail arm, we want more external rotation. So to get the trail arm onto the golf club and we’re just going to take our trail hand out in front with the palm facing towards the ground. Now as we rotate this arm over, allow that palm to face upwards. And you will feel obviously a lot of rotation in the arm taking place here. and also that elbow in particular facing down. Now, if I was just to bring the club down and bring my hand down like so. Now, we can see the butt end of the elbow facing towards this camera here. So, the trail elbow should face towards your body. Now, I’m going to twist my wrist over just so the palm points towards the golf club and I can grip the golf club as normal. So, that there is how we get the correct position for a connected driver golf swing to take place. Now the question is, how do we build this into the back swing? That brings us into stage number two. So as we set the club into this first part of the golf swing, being the takeaway, all I’m focused on here is allowing my trail arm to ever so slightly flex into position there. Just ensuring that my elbow continues to point towards the body as the bend of the elbow faces away. So, this movement here just allows me to get the correct amount of hinge in my wrist, the correct amount of flexion in my arm, and it also makes things easier for me to keep everything tucked in. So, my arm and body are more connected. So, as I make my way into that first part, that’s all I’m focused on, just doing that motion there, that feeling as we make our way into the first part of the golf swing. Now, you’ll notice some tall players won’t flex this arm at all. You’ll notice some that flex their arm a lot more than what I’m doing there. This is all down to what feels comfortable for you. Preferably, we want to see an ever so slight flex position, not too flexed because that’s going to encourage what we call our swing circle with driver to reduce. Because driver is a much longer golf club, it’s really important we keep a nice wide arc throughout our back swing and down swing all the way through to finish. So, I’m focusing on here just to add a little extra thought in your head for the takeaway. I’m just focusing on allowing that driver to brush along the ground and then I get the club working into that position there. So the club shaft there is parallel with my feet from this position, but the feeling there is all coming from this right arm folding into this position. We want to be really making sure that for the next bit we’re switching on the body. So to switch on the body, all I want you to think is back is going to face towards the target as you allow the hands to lift upwards. And you can see there that just simply allows me to get the club working on plane in a very much so reliable position from the get-go all the way up to the top of the golf swing. So you can just simply practice those two feels just to ensure we get the back swing right. Just like that there. So, same again, just practicing that takeaway, allowing the trail arm to fold ever so slightly, keeping that wide arc, and then we’re rotating the body, pushing the hands up into the top of the golf swing. Now, when we get to the very top of the golf swing, it can be very easy for golfers to let this right arm move away from the body. So the connection band makes that there so much easier to stop, but it also makes the rest of that back swing so much easier to implement because of its resistance type of material. It really forces both of my arms to stay closer together as we make our way into the back swing and therefore stay way more connected with the body. If you’d like to check out the connection band and learn more, I’ll leave a link in the description below for that. or again you can check out the QR code over to the right hand side of your screen and use the discount code if you would like to use this in your practice. So that brings us into step three, the down swing. So in order for us to be able to get that connection during the down swing, one of the most important things is what this trail arm does. Remember the trail arm sets it and the lead arm guides it. So lead arm, again, we don’t need to worry about the lead arm so much in the down swing. As long as we get the trail arm set into the correct positions, the lead arm will take care of itself. It’s going to make things much easier to hit the golf ball more consistently and straighter. So, if we can allow the elbow and the arm to work in the complete different motion rather than this action here, almost the feeling of this action here, elbow tucking into the body, that what look at what that’s allowing the club to do. If I just swing to the top there and I get the elbow to face in, that’s allowing me here to shallow the golf club very easily rather than letting the elbow move up and away. So, as I make my way into the down swing, what I’m focused on now, I’ve got the club into the position that I want. I’m just focusing on allowing this elbow with the feeling of staying in front of my hands at the start of the down swing. So, they’re not exactly going to get in front of the hands from this position here. You can see the hands are ahead. But to start off with, if that elbow stays in front, that’s going to allow this arm to stay very much so more connected. And that’s going to make things much easier to get the club to shallow the way we would like it to for the driver because that allows for a more upward attack angle to take place, hitting higher, straighter golf shots with the driver. But also, what it does is it ensures that our body starts to switch on. Watch what happens when I do that. As I get to the top of the skull swing, I’m not thinking about what my body is doing. But as soon as I get the club to do this action here, my hips starting to switch on, my hips starting to rotate to fire this golf club all the way into the back of the golf ball. But if you do break this down and go through stages one, two, and three, and then start to combine them, you’ll start to find this connected, more reliable driver swing taking place from the T- box. Another great drive there, just thinking about those three stages. Now, I understand although I’ve been able to break those down for you, it can be a lot to think about and remember during your golf swing or back swing and down swing that takes a second to take place. Well, I’d recommend taking a look at the connection band as that does simplify things for you. As I’ve explained earlier, if you’ve come this far into this video and haven’t yet watched part one, I’d highly recommend clicking onto this video over here as we’ll talk in detail about how this technique should work specifically for the irons. Thanks for watching and we’ll see you in that video over

