Perfect your golf wrist control with the Nick Faldo takeaway drill – learn the exact wrist set golf technique that creates consistent ball striking! Watch more ‘Tour Quality Ball Striking’ HERE – https://rob-cheney.mykajabi.com/joinus
🏌️♂️ For more information about the HACKMOTION wrist sensor, you can click here – http://www.hackmotion.com/robcheney
**Use Code – ROBCHENEYGOLF for 5% off**
Timestamps:
⛳ 0:00 – Why wrist control is golf’s biggest challenge
🎯 0:37 – Nick Faldo’s drill explained step-by-step
📊 2:07 – HackMotion data reveals wrist stability secrets
🔧 3:08 – P2 position setup with precise wrist angles
📱 5:05 – HackMotion app’s built-in Faldo drill feature
✅ 9:57 – Key checkpoints for practicing without sensors
💪 12:44 – Right arm position and final swing thoughts
Learn Nick Faldo’s famous wrist set golf drill that teaches you exactly how much golf wrist hinge to use and when to use it. This legendary technique helps you preset the correct wrist and arm positions at P2, then maintain that structure throughout your swing for incredibly consistent ball striking.
What You’ll Learn:
-How to preset your golf wrist position at P2 for maximum consistency
-The exact wrist angles needed: 5-7° extension and 13-14° radial deviation
-Why your wrists stay stable from P2 to the top of your backswing
-Faldo drill checkpoints you can practice without technology
-How to keep the grip end over the ball during the initial wrist set
-Proper clubface position indicators at P2
-Right arm organization in position three for optimal structure
-Common mistakes that cause inconsistent golf wrist hinge
#golfwrist #golfwristhinge #wristsetgolf #nickfaldo #golfswing #golftips #golfinstruction #hackmotion
🌎 ***Check out my website www.robcheneygolf.com ***
📲 Online Lessons via SKILLEST app – https://skillest.com/robcheneygolf
https://www.instagram.com/robcheneygolf/
If you enjoyed the video, please LIKE 👍 and SUBSCRIBE for more golf related content ⛳️
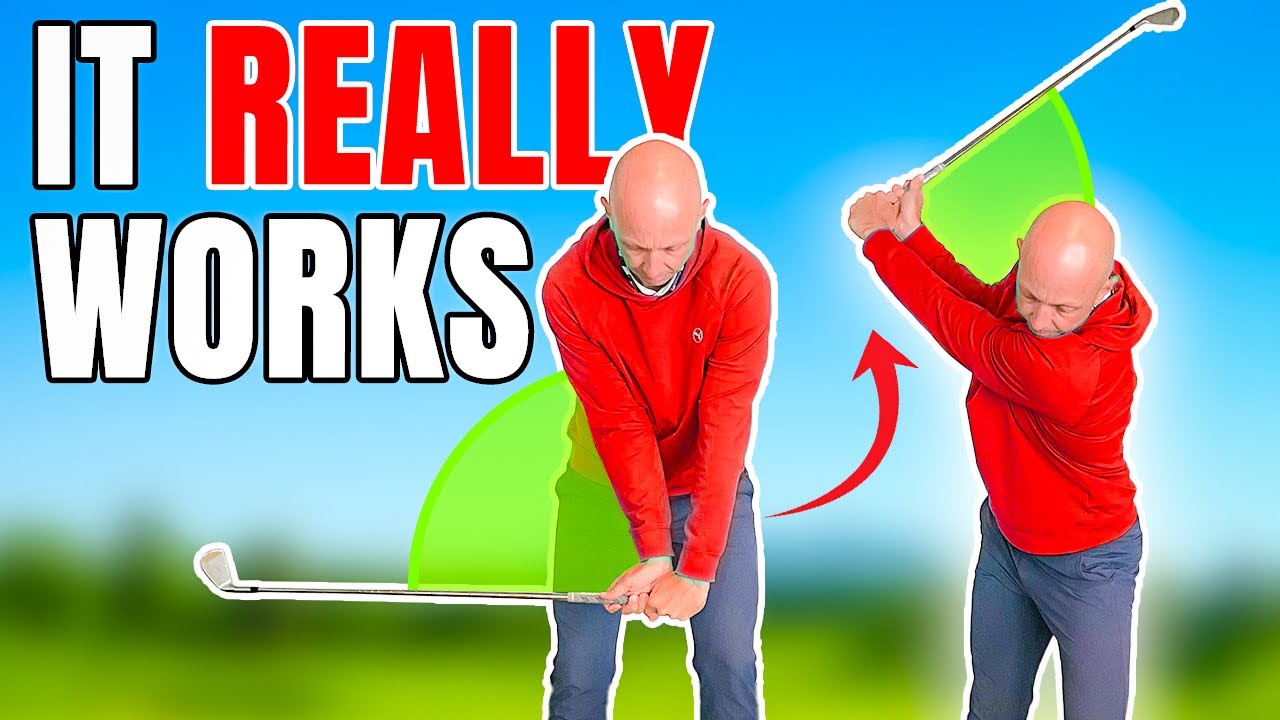
One of the most difficult challenges facing you as a golfer is how to control your wrists throughout the swing. The movement of the wrist dictates so much of what happens to your golf ball. And yet, it can be quite confusing and often overwhelming as to how much to do and exactly at what time to do it. Today’s drill that I’m going to share with you was made famous by Nick Fo, multiple major champion and worldclass golfer in his time. I’m going to be using the HackMotion wrist sensor in today’s video to show you how this Fao drill can help you not only control how much to turn your wrists, but exactly when to do it as well. So, the FAO drill works in a very simple way, like a lot of great drills. It simply allows you to preset the desired wrist and arm motion that you need at the top of your back swing and build it here before you even start to swing. So the concept of this drill is you take your regular setup and then move the club to P2, position two, where the shaft is parallel to the ground, simply by moving your wrists and arms in quite a specific way, which we’ll get into shortly. But once you’ve done that correctly, your job is simply to maintain these wrists and arm structure angles and transport them around your body. You’d be possibly surprised to know that the wrists really don’t change that much during that portion of the back swing in the down swing. They’re far more stable than you might realize. The general problem golfers have is they get the wrist hinge wrong during the back swing and then they’re trying to coordinate a very complicated and complex movement which often leads to poor shots. So, let me show you the FAO drill what it looks like done correctly. Preset the wrists and arms at P2. And then, as I said, I’m trying to hold on to that arm and wrist structure and simply transport it around my body. I feel like I’m maintaining the same arm and wrist conditions as I go through the motion. So, here’s the set position. And then transport that around me and hit the ball. It often gives a very solid feeling of contact. That one felt quite nice. I overdrew it a little bit, but the strike was pretty good. And what I would like you to notice when we look at the hack motion data of the wrist sensor that I’m wearing here is you can see on the graph how the owner radial deviation and the wrist flexion extension was extremely stable from the point where it measured me starting the swing which of course was this preset FAO drill P2 position all the way to imp uh to the top of the swing. It stayed identical. That’s a very stable wrist and arm structure that I’m sure would lead to much more consistent ball striking on your part. If you were able to set up and feel the club move around you in a way that was repeatable where those wrists and arms were more stable, then you’d be able to deliver the club in a more consistent fashion back to the ball. I can show you how that looks as well using the live avatar on the app. There we’ve got at setup I’ve got 16° of extension in my lead wrist and 32° of owner deviation. So there’s a setup there with my neutral grip. By the time I take this to P2, there’s a couple of significant changes there. I’ve reduced the amount of extension in my wrist. So my wrist has become flatter. That extension number is now down at five or six degrees of extension. and I’ve actually begun to radially deviate my wrists, hinge them upward. So, my wrists have moved up a little bit and it’s also flattened slightly. That’s where the complexity of learning the takeaway can get so difficult for so many golfers. There’s a lot of wrist movement there that you’re not always certain about. However, doing the FAO drill, you’re going to notice something whereby once I set the wrists into this condition, so that’s going to be five or six degrees, seven or eight degrees of extension here and around 13, 14° of radial deviation in my wrists here as well. Watch what happens when I swing to the top. Those two numbers stay very stable. Okay? They don’t change a great deal. There’s 5, 6, and 12, 7 and 12, 7 and 13. Now take that to the top. 6 and 10. 6 and 10. 4 and 12. Those numbers are staying very very stable. And that’s the skill of this drill really helping you to develop the ability to move the arms and wrists and therefore the hands and the club around you in a way that’s far more stable, far more consistent, and far more repeatable than you ever thought possible. So, preset the wrist at P2. I’m going to get into the detail of this in just a second because it is quite important that we do this piece correctly. And once I have that arm and wrist structure, move it around me and hit the ball. You can develop some very consistent ball striking doing this exercise. So now I’m going to show you how HackMotion have actually built the FAO drill into this app and I’m going to use that drill to show you the specifics of where the wrists and arms need to be at P2. It’s quite important we get that piece right, but if we take the time to get that piece correct, the rest of the swing becomes much easier to execute. Okay, so let me just show you how this drill really works and get into some of the specifics there of that initial movement of presetting the wrists and the arms because as I said that’s important we get that right but once we do everything else becomes much more straightforward. You’ll see here on the app I can select the FO drill and I can start the exercise here as well. Another great thing to notice about this exercise would be that it gives you the choice here of which club you’re using. Often times, one of the most common questions I get asked is, is it the same for the driver or is it the same for the hybrids? In this case, even the wedges. Depending on what club you’re using, it’s going to help you to identify if you’re moving the wrist correctly. Essentially, the feeling from a player perspective, I think, across the board with this this drill is very similar regardless of which club you use. But it’s great that we can also address the different clubs as we need to. I’m using a seven iron here, so I’m going to select iron. And then I want to show you something here with how this works as I go through the exercise. So it tells me to go into my setup position. And if I stand still for long enough, it will then ask me to move into this target position. And I’m going to get feedback here that I’m doing this correctly. That feedback’s both on the screen and in terms of the BOF feedback through the sensor. It actually vibrates against my wrist here. So I can feel that I’m doing this correctly. But let me speak to the fact that you could also do this incorrectly. If I was to move this club back and for whatever reason extend my wrist excessively, you’ll see that the screen is telling me that I need to flex my wrist to get it in the right position. You might look at this and think, “Well, that looks pretty similar to what you were doing before, Rob.” Well, it’s not quite the same. There’s a key element here that’s different. The club face is open because I’ve extended my wrist. So, the screen’s actually telling me to flex my wrist until I move it within range. Now, it feels correct. I’ve got the feedback and now I can go ahead and complete the drill. Equally, if I was to start moving the wrist into too much flexion into this position here, so it’s turned down, it’s going to give me similar feedback. So, setting the wrist into this condition right here has a few key pieces to it. You have to move the shaft to a point where it’s parallel with the ground and lined up with your stance line. But equally, we have to get the right amount of flexion and extension or it won’t let me complete the drill. Once I get this piece right, if I’m able to maintain that throughout the back swing into the down swing, it will tell me that I captured that rep correctly. It showed me that I did it how I was supposed to. I can go through the motion of that multiple times. Go to address, set the wrist, get the feedback, move it to the top, and even swing down. I could hit balls with this exercise as well, but to begin with, I’m just trying to get the feeling of taking it to the correct set position and moving it to the top. I’d also get the feedback which would be key for many of you which would be how you get the club to the top could often be via too much wrist flex or extension. You’ll see there I raised my arms up excessively. It shows me on the app I was too hinged and I had too much extension in that wrist as I moved it back. So the trick to this exercise is part one set the wrists correctly with the right amount of flexion and extension. get the feedback that I’m in the right spot. And then if I take that around me correctly, I’m going to get the feedback that I did that drill and that rep how I was supposed to. Conversely, if you are somebody who struggles with your wrist, which I see so many students do, if you’re moving your wrists out of position in the second half of the back swing, you’re going to get that feedback. Really, what this drill is trying to show you is number one, how much wrist hinge to put in. Build it in at the first part of the swing. And then number two, how to move that wrist and arm structure around you and start delivering the club in a more repetitive fashion. Hitting those balls very solid, even though it’s a drill. If you find it difficult to hit the ball with that drill, which some of you may well find, it’s not the most straightforward thing to do if it’s the first time you’ve ever tried it. Start out just by making the practice swings. get the feedback of just scuffing the mat, hitting the ground as you go through the motions. And then when it does come to hitting the ball for the first time, if you’re struggling to hit it from the ground, feel free to put it up on a very small tea. That will just help you with a little bit more margin of error in terms of completing the drill successfully. And finally, if you don’t have hack motion to give you the feedback as to whether you’re doing this correctly or not, here are the checkpoints that you should look for yourself. move the club from P1 setup to P2 where the shaft’s parallel to the ground simply by moving your wrists and keeping the butt end of the club, the grip end of the grip on top of the ball. So above the ball essentially what I’m saying there is that I’m not moving my arms and my wrists at the same time. The butt end of the club in this example will have moved away from the ball. So, the setup is standard. And then I’m using my wrists to move the club into position, but I’m keeping the hands, the end of the club, as I said, over the top of the ball. That’s a really good checkpoint. Also, from this front view, make sure the shaft is parallel to the ground. You don’t want to just hinge it halfway. Equally, this drill isn’t about hinging the club to this point either. So, parallel to the ground is your checkpoint on this front view. and parallel to your target line is also the checkpoint here from down the line. So that’s fairly straightforward to just move the club into that position. Take your time to get it into the right slot and spot. And then from here just check the club face. The way that you would know this club face was in a reasonably neutral and square condition would be that the leading edge of the golf club, the grooves if you like the club face was pointing just slightly down to the ground. Conversely, too closed would look like this. and to open the club face would point up to the sky. I’ve covered that in a very recent video about how you can learn to see the club face as to whether it’s square or open. There’s a good reference there for you at P2 to set the wrists, check that the club face is in a good spot. The final thing to mention here would be how this right arm is organized. I’ve covered this topic multiple times on the channel. It’s one of the most valuable things you could ever learn is how this right arm needs to be organized both at setup and throughout the swing. When doing the FAO drill, I can ensure that the right elbow is in position three. Now, if you don’t know what position three is yet, you’ve missed out on a ton of education that I’m going to link at the end of this video. I’ll I’ll show you exactly where to go if you want to learn how to do the arms correctly. Suffice to say, for the moment, we’ll call position three the losing the arm wrestle feeling or even the give blood feel where I’m turn my elbow to the point where my elbows pointing out towards the camera as if I was going to give blood. When I set the club correctly for the FAO drill, my elbows are together. I’m squeezing my arm slightly together. And you’ll notice how my trail arm here is slightly flexed. It’s not dead straight. That would be incorrect. It’s slightly flexed, tucked into my side, tucked into my rib cage, and it feels like I’m losing an arm wrestle with that right hand. I mentioned that this setup position is quite specific, but if you take the time to learn to set the wrists, get the arms into position from here, it becomes so easy to just start clipping these away. It feels extremely comfortable for me. Even though Trackman didn’t pick that one up, I felt like I made good contact. That was a nice shot. So, learning the right amount of wrist flex, the right amount of arm structure, holding that in place. I’m squeezing my arms together here as I transport my arms and my wrists around my body. Feels very, very solid. In fact, I enjoy hitting balls like that. That was a nice one. Tiny little push draw. Be happy with that. As I say, you don’t have to hit balls with this straight away, but learning the feeling of the correct wrist motion and also at the same time really learning to take away excessive and unnecessary wrist motion, which so many of you have in your swing, can be an extremely valuable lesson. Try the FAO drill next time you practice. See how that influences your wrist motion throughout the back swing and the down swing and notice the difference that that has to your ball striking. Guys, thanks for watching the video today. I hope you found it helpful and starts to dispel some of the myths and confusion around how the wrists work throughout the swing. If you really want to study the wrists and improve your wrist work in your golf swing, then there’s no better training aid to do that with than the Hack Motion wrist center. If you’d like to learn more about the Hack Motion wrist center and what it can do, I’m going to put a link down in the description of this video where you can get more information. And there’s also a discount code you could use if you decide to purchase one. In today’s video, I mentioned two other videos I would recommend you go and check out if you want to learn more about wrist control and how to organize and swing your arms around your body. The first one was about club face control and how you can learn to see whether this club face is too open or too close. You can go and watch this one right here. And then the other one was about how to aim your arms correctly. A truly valuable lesson that very few people really get to learn. If you want to check out that one, you can go and click here.


4 Comments
Great video. Very well presented.I am anxious to try it out today. You are the best.
I find this drill works great for irons but I struggle to do it with woods and driver. Perhaps due to the different angle of attack? Was hoping to see you do it with the driver. Thanks for the video and making me aware that hackmotion has added this drill.
I added this to my practice a while ago and I often play on the course with this when Im on my own. I hit the ball better and on camera my backswing is just in a better place. I haven't quite figured out yet how to blend it in to a normal swing and it's almost the opposite of the low wide takeaway which I was told I needed 🤔
This " Faldo " drill came from a book written in 1962 by Joe Dante called the 4 magic moves to winning golf.