5 Years of DIY Golf Simulator Advice in 19 Minutes
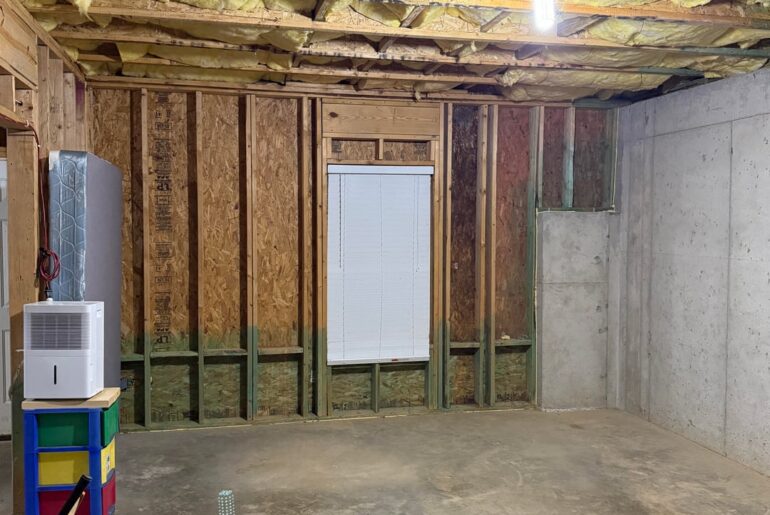
Over 5 years of building, upgrading, and fixing my DIY golf simulator, I’ve made plenty of mistakes, learned some industry secrets, and discovered some priceless tips. So, let me save you some time, some money, and a lot of frustration. Right, when I first got my golf simulator up and running, I was obviously buzzing. Yeah, two 300 golf balls a day. Loving life until I noticed that my brand new Pro V1 that I had just taken out of the box like a week ago had started to crack and split open. I thought I’d got like a faulty batch or something. But it turns out having to deal with cracked and messed up golf balls is just part and parcel of owning a golf simulator because you’re simply going to be smashing golf ball after golf ball after golf ball hitting so many shots usually with the same ball. They’ve only got a certain lifespan. And the same goes for gloves as well. You will find that you go through gloves like nothing before. So, this first tip isn’t really a DIY golf simulator thing, but a general golf simulator tip. You’re going to need to invest in gloves and plenty of golf balls. Whether they are premium or cheap, definitely get plenty in stock because you’re going to need them. Now, this tip is for anybody who hasn’t started building their golf simulator yet, but you are in the planning stage. Basically, you need to decide whether your golf simulator is going to be for entertainment and golf simulation, playing virtual courses and all that sort of stuff, or is it going to be for game improvement? Now, this is important to know simply because it’s going to influence the amount of money that you spend on your setup. For example, if you are after something that’s going to be accurate and recreating realworld golf course experiences so that you can practice in here and take it out onto the golf course, you are going to likely want to invest in a launch monitor that’s going to be reliable and accurate. And that’s going to cost you a little bit more money than something that’s on the more budget end that you can just use to simply load up and play pretty accurate recreations of world famous courses. Now, I’ve got a couple of products that are linked in the description below this video that can help you determine which is the right kind of setup for you. Do you want just a fun entertainment space or do you want something that’s really going to help improve your golf game like a fully professional golf simulator studio? So, if you are someone who’s in this research and planning phase at the moment, then check out those links in the description because they will definitely be able to help you on your journey. Before you start building your DIY golf simulator, there is one tool that I would highly recommend that everybody invests in, and it’s not that expensive either. It’s a laser level. These laser levels I have found to be unbelievably versatile in the amount of ways and reasons I have had to use this device. From aligning my impact screen to fitting my wall tiles to making sure my hitting mat is straight and my launch monitor is aligned correctly. A laser level is a tool that you seriously have to invest in just to save yourself so much time and frustration. So, you’ve just spent hundreds, potentially thousands on a brand new, lovely and clean impact screen. The last thing that you want to do is damage it or get it dirty. So, make sure that you are playing in your simulator with clean golf clubs and clean golf balls because if you’re not, then that impact screen is going to get dirty very quickly. Like most people, I hate cleaning my golf clubs. So, what I did to combat this issue of not enjoying that was I went and bought a golf boogie club cleaner. You know those things when you’re driving around in your golf car and then you want to clean your clubs and it’s just got a little cleaner in the side where you just ram your clubs inside it, give it a wipe and they’re nice and clean. Well, I bought one of those. It was about 50 quid off Amazon. I fixed it to the wall inside my golf simulator studio. So now whenever I’ve been playing golf outdoors on the real course and I come back into the sim rather than giving them a good scrub with a bucket full of water and all of that, I just simply take my golf club, pop it a few times in that golf cart cleaner, give it a wipe dry, and away we go. When it comes to making your golf simulator look the part, then you have to try your best to get the neatest and professional finish possible. When I first built my home golf simulator, I bought an impact screen that was just raw material. And what I mean by raw material was it wasn’t finished around the edges with the little grommet holes or velcro strips or anything like that. Now, this is a great budget tip. Yeah, if you are interested in setting up a golf simulator on quite a low budget, then getting a raw material impact screen is a great idea because you can still affix it to the wall or whatever using some bungee cords and some tarp clips. A really, really good money-saving hack. However, it wasn’t until I invested a little bit more money and I bought a professionally custommade impact screen that I realized how amateur my previous golf simulator setup looked. And the main reason for this was, can you see the black borders around the edge of my impact screen? Well, I think in the industry they call those pelmets. And those pelmets actually make a massive difference in the final look and aesthetic of your golf simulator. Now, if you buy an impact screen from a professional reseller, then the Velcro is likely already going to be stitched onto your impact screen. It’s going to come with these grommet holes, so it’s very easy to attach tarp clips or bungee cords to them to hang your impact screen, but also you’re likely going to get these pelmets as well. It might cost you a little bit extra, but it’s well worth the money. So, these pelmets come already installed with the Velcro, so they attach directly to your impact screen, and then you just have to attach them to your side wall. Mine are done with some heavyduty velcro as well that was supplied by Golf Swing Systems where I got my screen from. So I cannot explain in enough detail how much difference it makes to have an impact screen that is professionally done. Now whilst we are on the topic of impact screens, it’s very difficult actually to make the bottom of your impact screen sit nice and flush with the ground. However, there’s a couple of tips and tricks that I’ve learned. Now, one of them is from a couple of companies that I’ve reviewed in the past for their impact screens. One is Golf Room over in Europe and Carl’s Place over in the States. Now, these two companies have created an impact screen that basically has a little bit of elastic or a little bit of tensioning wire that runs along the bottom of the screen. And all you have to do is just get enough tension in it so that the screen sits nicely flush with the ground so that any shots that you hit thin aren’t going to nip underneath the screen and potentially hit the wall behind. Now, if you’re not going to get one of those impact screens and you’re going to get one from another professional company, which is like what mine is, like I mentioned from Golf Swing Systems, there’s no tensioning wire at the bottom of my screen. But a little professional tip to get it to sit nice and flush is you have to leave about 5 cm of overhang at the bottom of the screen. Fold it over so it’s just laying flat on the floor. And then you’ve got to screw the bottom grommet hole in each corner into the floor. That will make your screen sit nice and flush with the floor. Nothing’s going to ride up when you hit a golf ball into it. And most importantly, no balls are going to nip underneath the screen. Once you’ve done that, adjust the tension as you go all the way up and around the impact screen until it gets nice and nice and flat, nice and smooth, and then you’re going to have a lovely image with no dramas about any golf balls going astray. This next one is a nice little money-saving hack for you. So, can you see my lovely foam wall tiles that go along the side and they actually go up along the ceiling as well? They’re amazing and they look good. And I get so many questions about where I got them from and how much did they cost. So, I got them from Golf Swing Systems. They’re actually quite expensive. Yeah, you can get them a lot more expensive than these ones. Believe me, these were like a mid-range option for me. If you’re after saving a little bit of money, you don’t have to go all out and get this lovely side protection. You can actually just get some heavyduty curtains that go from the floor to the ceiling and you just put them along the side. In my personal opinion, I think golf simulators with curtains along the side look absolutely fantastic and they still look very professional. Now, the only issue with that is you are going to have to figure out then what you’re going to do with the ceiling. So, you might want to get some extra curtains and kind of just rouch them up on the ceiling so that any lob wedges can be caught and they just drop back down. or you might want to get just some netting that you can put up there that again is going to catch any golf balls that go really high. So, if you do go for curtains, the only issue is you’re going to have to figure out what you’re going to do on the top for your ceiling protection. If you do have the budget, then yes, give it a lovely professional finish and go for some nice side and ceiling wall tiles. Another little professional industry professional secret is regarding the flooring inside your golf simulator. Now, whether you’re building your golf simulator on a concrete floor in a garage or a wooden floor in a house or wherever, what you’ll notice is pretty much all of these professional companies, they will use these 10 mm or 1 cm thick foam gym tiles as a bit of a sub layer on the flooring. Now, there’s a couple of reasons for this. One is for sound absorption. Another one is for a bit of comfort and a bit of feel underneath before you put everything else on top of it. mainly because once you’ve got those in, it’s much easier to sink your hitting mat into your floor. So, what you’ll usually find is you’ve got these gym tiles, these gym mats that is the first layer. Then you might have some putting turf or some carpet on top of those. And what you can do then is you can cut out the foam tiles and the carpet or the pudding turf, whatever you’ve got. And then you can sink your hitting mat into that flooring and hopefully make it all nice and flush. Now, one of the biggest benefits of this is that your hitting mat will then no longer slip and slide around your floor when you are playing on your golf simulator because believe me, that’s happened to me and it’s extremely frustrating because it messes up your alignment to your impact screen. So, your hitting mat might be pointing slightly to one side and it’s not pointing to the center of your screen anymore. So, you can eliminate all of that by sinking your hitting mat into your flooring. And that starts by putting these gym mats down as the sub layer. Now, another little money-saving tip, right, when it comes to flooring is I mentioned just then about the putting turf or the carpet, whatever you put on top of these gym tiles, right? As you can probably see, I’ve got this beautiful putting turf inside my golf simulator studio. And yes, it is fantastic. It’s a specialist putting turf that I got from a company here in the UK. It looks fantastic. It rolls very nicely, very similar to a putting green outdoors. However, it is very expensive. Now, what I would recommend if you’re actually after saving a little bit of money is you don’t have to bother with some lovely putting turf like this. All you need really is just some carpet. Just some thin pile carpet. That’s going to work absolutely fine. If you go into most golf stores that have got a putting green, you’ll probably find that it’s just a very thin pile carpet that they’ve got built up on top of whatever they’ve made the putting green out of. That works absolutely fine to practice your putting. So, there’s no need really to go and get this expensive putting turf. If you’ve got the budget, then yeah, go for it. It looks fantastic. It does a great job. But if you’re trying to save a few quid, just get some thin carpet. Even these extremely expensive putting greens that like mechanically move around to give you all the undulations and stuff like Zen Green stage and that. I’ve looked at those and it’s just super fine, super thin carpet, right? It’s not this specialist putting turf. And you would think that if a company are going to build a movable putting green that looks fantastic and is meant to be all singing and all dancing, then they would use this specialist putting turf. But in my experience, they don’t. They just use thin pow carpet. So do the same as them. One of the biggest things that people don’t realize about owning a golf simulator is actually how loud they can be. Now, it’s one thing hitting your golf ball with a golf club that makes a pretty big sound as it is, especially with the driver and with the woods. However, there is the second sound of the ball smashing at 100 mph plus into your impact screen. Now, if you get an impact screen that is cheaper or on the cheaper end of the scale, the budget scale, then it’s likely going to be a bit of a thinner impact screen. Now, in my experience, having a thin impact screen can be fantastic because they often project a beautiful image and you can get a great display when you’re playing virtual courses. However, those thin screens can be extremely loud when you are smashing a golf ball into them. Now, like I mentioned earlier, these professional impact screens are going to be much better for you to buy if you can afford them. They’re going to be more durable. They’re going to have better soundproofing capabilities. You’re going to be able to project up to a 4K image on most of them as well. But if you’re on a budget and you can’t afford to spend all that money on a professional impact screen, got a little bit of a tip for you. Look into getting some archery baffle netting. Right? Get some white archery baffle netting. It’s cheap as chips. You can still project an image onto it, but bear in mind the image quality is not going to be great. If you’re not too bothered about the image quality and you just want that introduction to an immersive golf simulator experience, then look at this archery netting because like I said, I think I got my first archery net for about 80 quid and I could project an image onto it. And another bonus about the archery netting, it’s super quiet. So whether the kids are in bed or the MS is watching TV next door, you can be smashing golf balls away inside your garage or your spare room and it’s not going to disrupt them too much. Now a lot of people build their home golf simulator in a garage or a spare bedroom or an out building or basement or something like that. Now one of the most important things that I think gets overlooked is the actual ventilation inside that room. Now let me give you a scenario. My first golf simulator was inside my very small single garage here in the UK. And that garage had no windows. It obviously had a door to get into it, but there was no ventilation in there. It was a very small space. Now, I was spending two 2 and 1/2 hours, maybe longer sometimes, in that very small space. I was hitting a golf ball off a sandy, dusty, old golf mat. And then after a certain amount of time or even when I came out of that room and then I got out into the fresh air, I realized how much the lack of ventilation had impacted me inside my golf sim. So what I wish that I had back then was just a window in there just to open it whilst I’m playing just to get a little bit of fresh air in there. So whether you’re going to get some air con or get a window installed or just get some sort of ventilation duct wherever you are putting your golf simulator, I would highly recommend getting something like that just for the good of your own health. Now, I’ve mentioned this plenty of times already in this video. Professionalism is the name of the game when it comes to golf simulators. To have a good-looking golf simulator, it’s got to look sleek and smart and professional. And there’s nothing that’s going to make it look less than professional, more than having dangling cables and dangling wires here, there, and everywhere, extension leads running all over the show. So, my tip to you is if you are in the planning stage of your home golf simulator, make sure you get all of your plug sockets and everything pre-installed before you start decorating and kitting out your room with your golf simulator. So, it’s very important. Cable management is very important. Whether it’s your HDMI cable going from your projector to your computer, make sure you can route it through a wall or behind some plaster boards or get all of your electrical sockets pre-installed before you start putting any plaster board on or anything like that. Now, I’ve made this mistake with my old simulator where I had extension leads running all the way across the room and I’m trying to tuck them underneath putting turf and all of that sort of stuff. I even made this mistake in my brand new golf simulator as well because I didn’t get my HDMI cable from my projector running nicely behind my plaster boards beforehand. So, I’ve had to clip it all up and yeah, it’s out of shot. It looks nice on camera, but if you came here in real life, you would see it looks a bit scruffy. Now, if you want some more detailed information about exactly how to plan your golf simulator room before you’re even starting, then check out the links in the description to my online course. Now, this course not only tells you how to plan your golf simulator room, but it walks you through every component from launch monitors to projectors to flooring to impact screens, absolutely everything. So, if you’re interested in building a DIY home golf simulator, check out the links in the description below. One very important component of your golf simulator room that you’re really not going to want to cheap out on is something that you probably don’t expect. Now, your launch monitor, you might think, is going to be the most expensive device or component that you buy for your golf sim. However, a very close second to your launch monitor in terms of cost, and sometimes it’s going to cost more than your launch monitor itself, is going to be the projector. Now, your projector is extremely important if you are going for an immersive golf simulator experience. Now, I used to have an old projector, right? And I’m not going to lie, it did a job. At the time, I thought it was fantastic. It gave me a really good golf simulator vibe and experience. However, it wasn’t until I upgraded to a proper projector. And by proper projector, I mean one that’s got the right amount of brightness in terms of anti- lumens and all of the correct features to help you install it correctly. That was when I realized how much I’ve been missing out on an immersive a really immersive golf simulator experience. Now, projectors can be a bit of a minefield, and I’ve done multiple videos about different projectors that are suitable for golf simulators over on my Handicap Golf YouTube channel. So, head over there and hit the subscribe button. But the point I’m trying to get across to you here is don’t skimp out or cheap out on a projector. It’s very easy to be able to do that because you don’t want to spend a load of money on something you think is probably not going to be that important. Trust me, if you’re going for an immersive experience, you’ve got to get a decent projector. If you’re on the fence about building a home golf simulator, then don’t be. Just go and do it. The best bit of advice that I ever received was that you don’t have to build all of this. You can start small. All you need to get started is a launch monitor, a hitting mat, and then something to hit into. Now, you can get a fully functioning and working home golf simulator for less than £1,000. As long as you’ve got the space to swing a golf club, you can build a golf simulator. And if you want to know a stepbystep instructional guide about how to build everything to make a professional simulator setup like this, then like I mentioned before, check out the links to my online course in the description below. Or you can just download my ebook which has got very brief explanation of all of the components as well as some discounted links to everything that you’re going to need to buy a home golf simulator to save you some money. My name’s Mitch. If you’re new here, subscribe to Handicap Golf. Hit the like button and then check out this video that’s on the screen right now.
⛳️ The step-by-step system to build the ultimate DIY home golf simulator https://mitch-s-site-003e.thinkific.com/courses/golfsim
👉🏼 DIY Home Golf Simulator guide, with exclusive discounts https://handicap-golf.ck.page/products/golf-sim-guide
___________________________________________________________________________________________________
Thinking about building a home golf simulator? After 5 years of trial and error, here’s some advice I wish I had when I started. From picking the right gear to avoiding common mistakes, this video covers everything you need to know to get the most out of your setup—whether you’re on a budget or ready to go big.
___________________________________________________________________________________________________
Buy your golf buggy cleaner here: https://amzn.to/4kmANML
______________________________________________________________________________________________
Save money on golf simulator products using my discount codes below:
🇬🇧 HANDICAP5 https://www.golfswingsystems.com/shop/golf-simulators/
🇺🇸 HANDICAPGOLF10 https://www.playbetter.com/collections/golf-simulators?ghref=11569%3A656440
______________________________________________________________________________________________
📩 Join the mailing list for regular golf simulator tips & advice: https://handicap-golf.kit.com/c4e58a2978
#golfsimulator #golf #golfsim

