This video shows step by step how I built a new 4 and 5 iron in the Takomo 101t for Wesley Bryan. These clubs were built to match up with the Takomo 301CB irons I previously built for him. Included in the video is how I measure length, lie, swing weight and how to properly prep and assemble a golf club.
Interested in a custom build, repair, or club fitting. Contact me
elitefitgolf.com
adam@elitefitgolf.com
All right today in this video I’m going to be building a couple new golf clubs for Wesley Bryan professional golfer YouTube sensation I’m going to show you what we’re building and how I build it let’s Go hi everyone welcome back to the channel hope you’re having a wonderful day so today in this video I’m going to be showing you how and what I’m building for Wesley Bryan we’ve got a couple new irons that he’s going to be trying out maybe putting in his bag uh we’re going
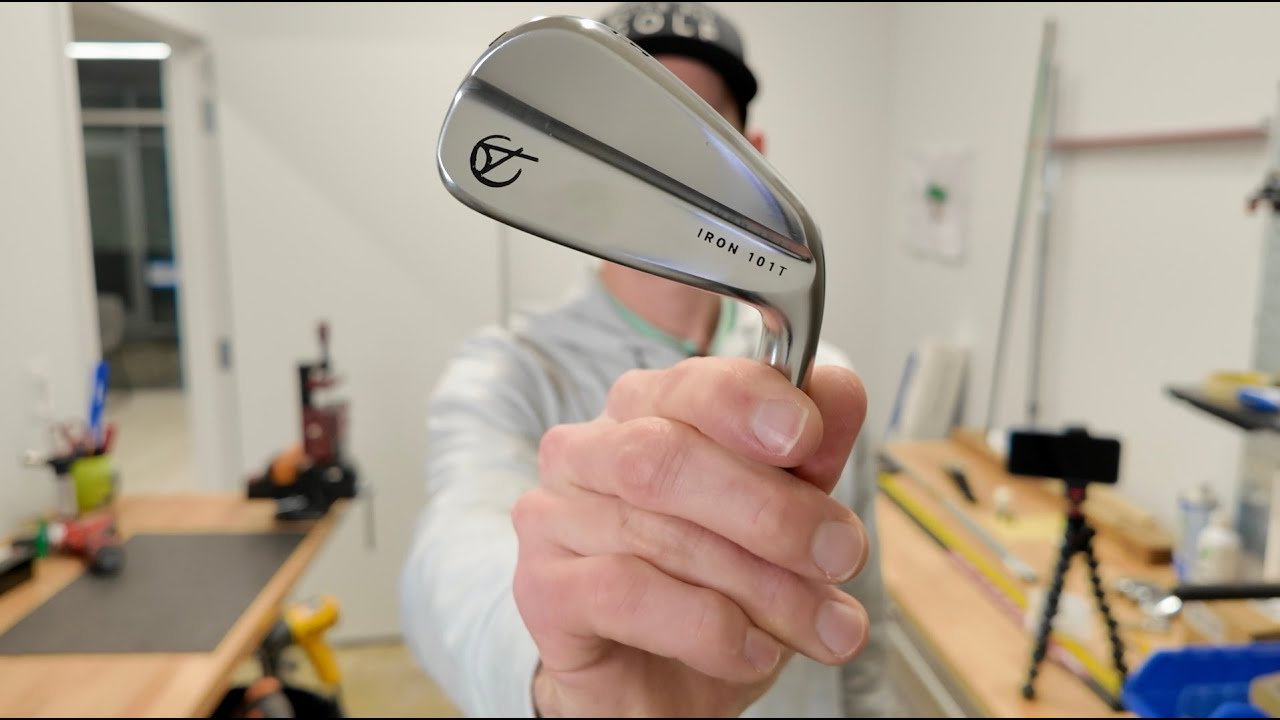
To be using the same specs that I used when I built his Tacomo 301 MB and CB irons however today we’re actually going to be using the Tacomo 101 t Iron Head in the four and the five iron let me show them to you side by
Side so here’s the four iron of the 301 CB that he currently has in there and here is the 101t as you can see as we look at these two clubs the 101t looks pretty similar but it is definitely a little bit thicker a little bit more forgiving as a
Hollow body iron and should be just a little bit easier to get the ball up in the air land it softly all the things that you want especially in a long iron so that’s what we’re going to be putting together today I’m going to be using the exact
Same specs that I used again for the 301 so same shaft same grip same length lie Loft all that stuff but I’m going to show you the entire process from start to finish building these 301 excuse me building these 101t irons for Wesley Bryant okay first
Thing to do let’s get these iron heads prepped obviously these are brand new heads so we didn’t have to pull anything they are are ready to go but we’re still going to go clean up the inside rough them up a little bit first off we’re just going to
Drill just rough up the inside a little bit next got a little acetone here and again we’re just going to wipe everything out here just make sure there’s no residue in there that could hamper the epoxy you could also use denatured alcohol of course but acetone works
Great I use it all the time and I’m going to continue using it so okay all right next up shafts we’re going to be using the granddaddy of all steel iron shafts and what we already have in all those other irons which is dynamic gold X100 two are issue so they are weight
Sorted to a tighter tolerance we’re going to get these tips prepped we’re going to measure them out cut them and then we can move on the swing waiting and assembly all right next up let’s measure these out we’re going to be going what I consider standard length which means 38
In 5 iron 38 and 1/2 in 4 iron let’s get these measured up four iron we’re going to measure out to again 382 which means we’re going to cut it at 38 and 38 just like that go ahead and write four iron on it five iron we’re going to measure out to 38 in which means we’re going to cut it at 37 and 78 put a five on that one all right now we can cut these [Applause] sh
Okay next up we’re going to swing weight these make sure that they are balanced with each other and with all the other golf clubs that we’ve already built for him so first thing I’m going to do here is just put a piece of tape over the end of the shaft this is going
To do two things one it’s going to add a little bit of weight to it just to make sure that the swing weight number that we get is pretty accurate it’s also going to ensure that when I use this split grip which is the exact same tour velvet we’re going to
Use with the final clubs that it doesn’t end up sliding too far down getting cut up by the end of the shaft that’s kind of sharp so this way it sits in the right position it’s the right length when we put this on like this and it’s a very good
Uh comp for the final grip that’s going to be on there that way we know all the measurements and weight are going to be correct all right all right so here’s the four iron heads on let’s see what we get here as it sits and it looks like we are going to
Be right about right about just over D1 right now for the four iron let’s check the five and let’s see what we get there and the five iron looks like just about the same maybe just a fraction maybe just a fraction lighter so we will make note of that and adjust
Accordingly during the assembly couple things to mention at this point first off feral that we’re going to be using here I am just using the exact same feral that I did with the other irons that I built for Wesley which is just this sort of medium height black simple feral so it’ll have
The exact same feral should blend pretty seamlessly from those 301s into this 101t which is what we want other thing to make a note of here is that these heads these Tacomo iron heads are all 370 tip they are all parallel tip hles or parallel with hles however these shafts Dynamic Gold T
Issue x100s are all 355 taper tip shaft so what that means is if you just put this shaft into this head you’re going to have a fair amount of wiggle and you don’t want that because it can lead to the shaft leaning in different ways it
Also means the bond won’t be as good none of those things are what you want so we’re going to be using again one of my favorite tools and I’ve mentioned them in countless videos but we’re going to be using our standard brass shims to ensure that we get a nice snug even
Symmetrical fit so that everything is exactly where it needs to be and holds together properly okay next up since we are using brass shims we are going to go ahead and just like we do with every other surface when we are building golf clubs we want to just rough them up a
Little bit so I’m going to rough up the [Applause] inside with my sanding dowel and then we’re going to rough up the outside with the belt [Applause] sander And while we’re roughing things up let’s go ahead and we’re going to rough up the inside of these ferals as well just to make sure that they stay put all right everything’s prepped everything’s ready to go let’s mix up some epoxy get these guys put together all right I’m
Using my favorite Golf Works two or set plus epoxy basically sets in about 60 Minutes is fully cured in a number of hours but we’re going to put it in the hot box speed everything up a little bit so that we can get this all wrapped up
In a single session we’ll also go ahead just just add a few shafting beads to this just to ensure that we get a more centered fit just one little scoop like that should be plenty let’s get these stirred up I like to mix my epoxy for a good 60 seconds
Just to make sure it is fully combined I think when people sometimes have issues with epoxy and sometimes they have epoxy failures I think one of the big reasons for that is not not thoroughly mixing the epoxy that’s also why I like to use these little cups because it just ensures that everything
Gets mixed together well and properly when you try and mix it just on a piece of cardboard or something like that it’s not always as easy to get the edges of it all mixed together properly whereas this it’s all self-contained you know you’re getting a good full complete mix
Let’s put these together again the swing weight on these was coming out right around D1 we are not going to add any additional weight because we are going to be doing one extra thing at the end of the build that I’m going to show you
So uh the fact that these are just a touch light cuz what we’re hoping for is around D2 uh having them at D1 is actually perfect for right now let’s get a little epoxy on there down we go inside the hosle again don’t over epoxy just enough to coat all
The surfaces it’s all we want let’s grab the matching shaft make sure you always have the right shaft for the right head we’re going to put a ring of epoxy right there real thin just to help hold the feral in place we’re going to slide the feral on into a general location
Just about an inch or so up off the tip of the shaft now we can go ahead put some more epoxy on the shaft like that that next we’re going to take one of our brass shims slide that over the end try not to get it all over our
Fingers just like that and now we just want to make sure that we get a little bit of epoxy on all the legs of that brass shim just like take that and now we just put them together slide it in work it back and forth and now we can start
Twisting like that we’re going to tap it down a few times make sure it’s fully bottomed out in the hosle and you will hear it when it bottoms out it makes a different sound and now we’ll spin it a couple more times and then just make
Sure that our logos are where they need to be and we’ll go ahead and double check that in a minute or two but put that right there let’s go ahead and wipe the excess epoxy off wipe the bottom part between the hosle and the feral and then wipe the
Top part between the feral and the shaft right like that okay we’re going to rest this right here for a minute and we’ll come back to it let’s do the other one again same deal some apoxy down inside the head just coat all the surfaces next quick ring of epoxy around the
Shaft tip feral on slide it up about an inch or so like that get a little more epoxy quick coat on the shaft like that brass shim into place again paint all the legs just like that that and now we put them together again bring it ight let’s give it a few
Taps give it a few spins and let’s wipe it up on the bottom try not to get it all over my hand and around the top just like that all right set that like that you get a little more paper towel we’re going to put just a tiny bit of grip solvent on
There just a help wipe off any residual epoxy that may have gotten anywhere so first thing I like to do again is make sure that our logos on the shaft are actually where they are supposed to be so this is obviously going to be logo down so we want to make
Sure that the dynamic gold is nice and in line with the shaft just about like that okay and now we can just give it one last little wipe down make sure we wipe all around the hazzle the cleaner you get this now the easier it makes it when you come back to
Finish everything off later just makes for a much simpler final bit of cleanup so little extra work here will pay off at the end everything looks good this guy into the box as well we’re going to go ahead put this epoxy also into the box because that will tell us when
Everything is cured and ready to go and now we can zip this up and we’ll come back in about an hour all right epoxy’s dry we can turn down the ferals now we’re going to bend the LI angles put the grips on we got one other little thing we’re going to do and
These clubs will be ready something for okay one last thing to do before these clubs are ready to ship out and that is I’m going to be adding just a tiny little bit of Hot Melt into the little ports that are out here on the toe end of these clubs just to help
Bring the pitch down just a tiny little bit and I think it’ll help match them up with those 301 CBS so that everything sounds and feels a little bit more consistent so last thing we’re going to do and then these can get out of here okay all right all finished with the Tacomo
101 T four iron and five iron here for Wesley Bryan spec checked everything out everything looks good should match up perfectly with the existing set of 301 CB mbbs that I already built for him hopefully these can go right into the bag and be just a seamless transition
Between that six iron there and then going into this five iron and this four iron so I’m going to package these up get them shipped out keep an eye out for them on YouTube they may pop up somewhere so hope you enjoyed this video if you did like comment subscribe hit
The Bell icon so you’ll be alerted when I post new videos and I will see you on the next one bye



19 Comments
I have seen many videos on gripping clubs, blowing grips on without any two sided tape or the std. two sided tape and solvent. Pros and cons for both. Thanks
would you say the 101T is a forgiving iron. Im a +18 handicapper and was wondering whether youd suggest these?
Having you build Wesley's irons blows my mind. It's like my dad meeting my idol.
Nice! Great shop setup and equipment sure helps things. Pleasure to watch someone work who has mastered the trade.
Great presentation, am curious why you deducted 1/8" from overall shaft length? Is it made up with the grip?
The long irons are very long. I am selling my UDI P790 2 iron because the 4 and 5 are great!!
I used just sand paper to rough up the shims I used. Love this. I do need a swing weight scale
As usual great video. I was especially intrigued since you were building for Wesley. Let’s see how he performs now once he gets accustomed to them.
Love your setup and video! I have always used the shoe shine method for turning ferrules but I am still not great at it. Hot melt is interesting. Thanks again
Arguably the best fitter in the Southeast
AJ, thanks for the detailed video on building clubs. A couple of questions: 1. doesn't adding the metal insert into the hosel add weight and change the swing weight, if so, how do you compensate for that? Do you make the initial swing weight lighter? 2. How do you now how much hot melt goes into the clubhead to get the swing weight you desire? I didn't see you measure any of the hot melt. Cheers.
Did you put wooden dowels in Wesley's previous build? I thought I heard that somewhere, but was unaware you built them for him? Always love your content.
Great video again, very interesting! How about a video on all the tools in your shop and where your club making experience started.
I have never built a club but I found your videos fascinating. Thanks for sharing!
is there any benefit to finding the spine of each shaft prior to assembly?
From the time Wesley announced his WITB, I have been trying to figure out how to get the x100’s from the takomo site in the combo set! Finally know how 😂
Do you mesure head weights to be sure shafts will respond true to flex ? i've built Takomo irons . ,really heavy heads and shafts are playing softer …
What you think about Takomo 201 irons? Are those too difficult for 15 hcp? Like your video!
@bryanbrostv is quickly become top ten channels for me 🎉