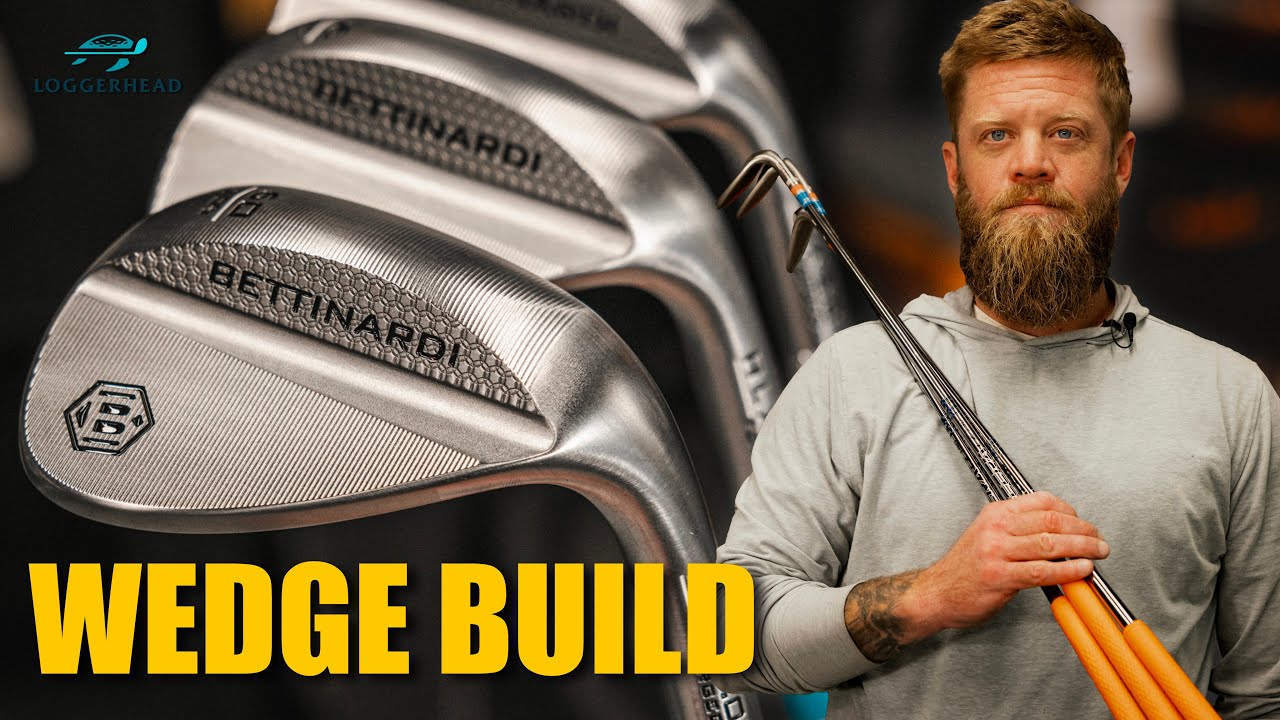
Not your average wedge build! This one was fun!
Components:
Heads: Bettinardi HLX 5.0 Forged Chrome
Shafts: ACCRA TZ 130
Grips: Iomic Sticky 2.3
Ferrules: BB&F Co.
#custom #golf #golfclub
All right cool yeah so today a little more casual we’re going to build the wedges for the raffle giveaway um not as in depth but I will be unlike last time kind of talking through why or what I’m doing a little bit as we go not a lot um
But let’s get started we got three to build I’m going to first make sure these cpms blend properly um not really really really necessary um Acura makes a very good shaft as far as tolerances go they usually match up and we’ve got three wedge shafts so there won’t be really
Any tipping hopefully the real reason why I’m doing this with the wedge package is if we were to especially with lower grade shafts if I was to get anything it was really lower CPM or really higher CPM I might try to make some adjustments or toss a shaft in a
Set blend we want the lower CPM stuff to always be in our longer irons cuz just means it’s going to get up a little easier um so that’s what we’re checking and you know usually there’s a set CPM drop as we go down from four five six seven you’re all set yes sir
So here you go these are firm all right next up we’re going to rough these up like I said didn’t have to measure tip anything 355 is here this is the TZ wedge shaft 130 just going to get them so that they uh bit up in these heads we got bet nardy
That’s just to make sure I mean even though these are brand new wedges um has rust has some sort of debris stuff like that um two parts traction for the epoxy you know it it that brush itself will scar up that metal a little bit make it not as smooth
Plus old or new head if we have some junk in there as I’m roughing trying to get a perfect fitment for the shaft if I didn’t clear out the junk and then I clear it later then all of a sudden shafts skinnier than I want we C some
Lean which makes them not sit right which we could throw off like the actual L angle it could make epoxy leak and make the feral not sit properly so just good to do it sometimes you got junk in the bottom of it you don’t think about
It and then you clean it out and you’ve already butt trimmed it and you lose lose an 18th of an inch or something like that which is not ideal if you want to know and you’re trying to just get small stuff you slightly twist it you’ll see like a
Little Mark where oh that’s just the portion I got to do I don’t have to go all the way over because you don’t want to you want to make sure you get a even taper on these Things all right done roughing up the tips we’ll see the fitment on the ferals when we go to build we might rough up a little further if they’re too snug to get over that paint but that’s something I’ll see as I start putting them together um Next Step we’re going to get
Them cut to length our guy wants them half over standard to force myself to not get too quick I still take the time after all these years I like to write everything out um just as like just a mental checklist I can write down to make sure I don’t get ahead of
Myself and because we’re doing play length we’re just measuring out a quarter of an inch below our number cu the grip is going to add to it and that would be our playl you Need all right make sure this thing didn’t change all the day off it’s important goes at home using these make sure you rezero them every day this can twist give you improper numbers but we’re good and healthy one thing we’ll do real quick because I got this uh this
Comment you know why don’t I just have standard cut grips to use away versus going specific we’re g to see okay we got a iomic here weighing in at 50.5 grams MCC plus 4 weigh in at a healthy 69 Gams um that’s why I like to build with the
Specific grip whatever whatever is actually going on the club we’re going to use we got a nice start point I mean most wedges in a classic D2 blend which is what you’re going to see in steel on the floor you’re going to want to go
Into like a D3 D4 these have a drop weight cavity it makes them even easier to get heavy but we’re starting out of a D3 here with our gap wedge we like that let’s turn this way stuff you find that comes in your shop that’s an extension
In graphite that’s over an inch long that’s dangerous you’re making something that’s going to break inside someone’s hand sorry sorry sir sorry cut cut that’s what I deal with on a daily basis he’s got his own tools wants to use mine um someone unplugged my trying to be productive well someone took the
Saturday off had the whole weekend off I had to move some stuff around okay as we know we saw earlier without taping the feral on we had a D3 we taped the feral on especially with the larger BBN FCO ferals shout out BBN FCO great ferals like using them
Them yeah we added a full swing point so now we’re at D4 you know we’re going to put at least you know minimal you know amount of epoxy in there get it a stick so we’re probably staying out the gate these are going to go to D5 pretty
Easily without any sort of weight adjustment by me all right yeah this is why we go through all of them of course we’re going to have some very in tolerances in the heads due to the grinds and taking off metal or just sometimes you know there’s different sets you can get lightweight heads
Heavyweight heads so we’ve got a little bit of variation as far as what we don’t want going lighter as we’re getting into our lower wedge we want to see heavier not lighter or we’ll keep it static but it’s only a point so we can make that up pretty easy in the build
Process just as a man of many many ideas everybody your tape idea was brilliant the twisting of the tape I’ll say that and he’s found out if you have a million ideas eventually one is going to be a decent one yeah so he’s good for about one a
Month just know that I’m not talking to myself Justice is talking to me for what you can hear these wedges have drop weight cavities all right little little lead weight wash your hands don’t lick your fingers after using these and then there’s a small you know the
End of that hosle is right here and it has an inner cavity that we can drop down line up flush add weight not going to mess with our length cut let we go back at it this should get us most of the way there do have limits
To how deep those cavities are so you can only drop so much much so long of a weight down there it’s 2 G of point we put six GR in there that’s what we needed boom it switched it to D3 so now we just got some minimal work to do in the build
Maybe sprinkle some magic magic dust in the epoxy all right make up some epoxy I know you’ve noticed already before you say anything this is what happens when you send your general manager to go get you Dixie Cups finds a great deal but he finds a huge Dixie cup so we
Adjust love you Steve slipping on the feral we didn’t have to do any extra roughing it slid right on usually with 355s BBF stuff goes on pretty easily 370 sometimes you have to do some extra roughing spine mark That’s one good thing Acura and a lot of the other companies
Are actually and I’ve I’ve kind of tested it I’ve reined behind them but they give you on these shafts the the puring Mark if you will that some people talk about or the spine Mark so that you don’t have to worry about doing it yourself if you trust
Them I’ve done several hundred of these and they haven’t been wrong yet so one down two more there’s been lead powder there’s all sorts of stuff people use this tungsten’s heavier it’s more expensive but you don’t have to use much doesn’t affect the Integrity of the
Epoxy which you don’t want you want to make sure you put enough in it to where you don’t have a lot of stuff creeping up the shaft on purpose there’s some builds I pulled apart from other guys where I’ve got a rod of tungsten epoxy shoved halfway up the
Shaft by doing so they got a weight on the scale they’re looking for but all that expensive fancy technology you’re looking for the reason why you pay more for certain shafts a lot of it’s down here plus you have the actual profiling of the shaft if you put effectively a
Steel rod down the middle of it of epoxy mixed with tungsten that goes all the way up to here you’ve eliminated the feel of the shaft you paid for one of my soap boxes there we go definitely gives you little bit different of a sound when it’s finally seated tells you you’re
Good see what we got to weight was there we go whether it’s skill or luck we got right on the number first try that we were looking for yeah the reason why we’re going to preat before we put our drop weight in is because the drop weight soon as you turn you know
Obviously the head like this to either tap in the shaft or like I’m not when I’m going like this I’m actually pulling up with this hand and pushing I’m not like put my full weight on that shaft just the weight will keep dropping and if it doesn’t go right back into that
Cavity it’s pushing in that shaft you’re trying to tap so you’re either going to hurt something or you’re not going to go anywhere definitely make sure you get all your fingerprints and stuff off the club before you put it on the wall found that customers don’t like your fingerprints
Forever glued to there Club hats all right now we wait for them to cure all right welcome back day two we let the wedges like naturally cure on the rack here overnight versus throwing them in the curing cell all it’s left is to turn these ferals and get the grips
On might notice a change to the shop we did some rearranging while these were curing ferals when you just originally put them on they always have some overhang you know you got thumb catchers they don’t look finished they don’t match the hosle design there’s different widths of hles
So you just want to make sure you get that natural taper what we’re not going to do and you’ll see with some people early on as they’re turning ferals we’re not going to leave that belt right here cuz it’ll square off and then start its taper you’re going to see I’m going to
Let it travel with these fingers up here so I can do the taper the full blend so I still get that natural angle of the uh Barrel itself that’s why I put tape down here on some graphite because I run the belt and I don’t every once in a while
You can burn it over and tape don’t care versus hurting the the logo on the composite shaft well now we just going to the acetone just eats away a bit of the feral makes it smooth gets it shiny again after uh using that felt belt you
Ready all right final step and our wedge build we’re just going to throw the grips on this client asks for an additional three wraps we’ve got a standard size iomic here we’re going to get it to Mid um one of the reasons some players prefer this is versus going to a
Mid where you got a lot of squishy rubber in your hands especially with a grip that’s designed to kind of be an anti-torque grip you stretch it so it stays firm or gets firmer but gives you the grip size that you want it’s always good be careful when you’re
Building up tape you don’t want to ride the same line every time so you’ll get a ridge you know ping and some guys still wrap their tape which does the same thing so you can’t get like a ridge in it I just rotate my start points of where I start my
Tape so I don’t get any overlap in one spot what was that I’m always thinking about eating all right five hours later yeah you got to be real careful cuz if you get a wrinkle in there it just blows it all up and you don’t want to
Get three wraps in and get a wrinkle and have to start over Open for He


1 Comment
Good stuff