How I Built a World Class Home Golf Simulator for $6,295
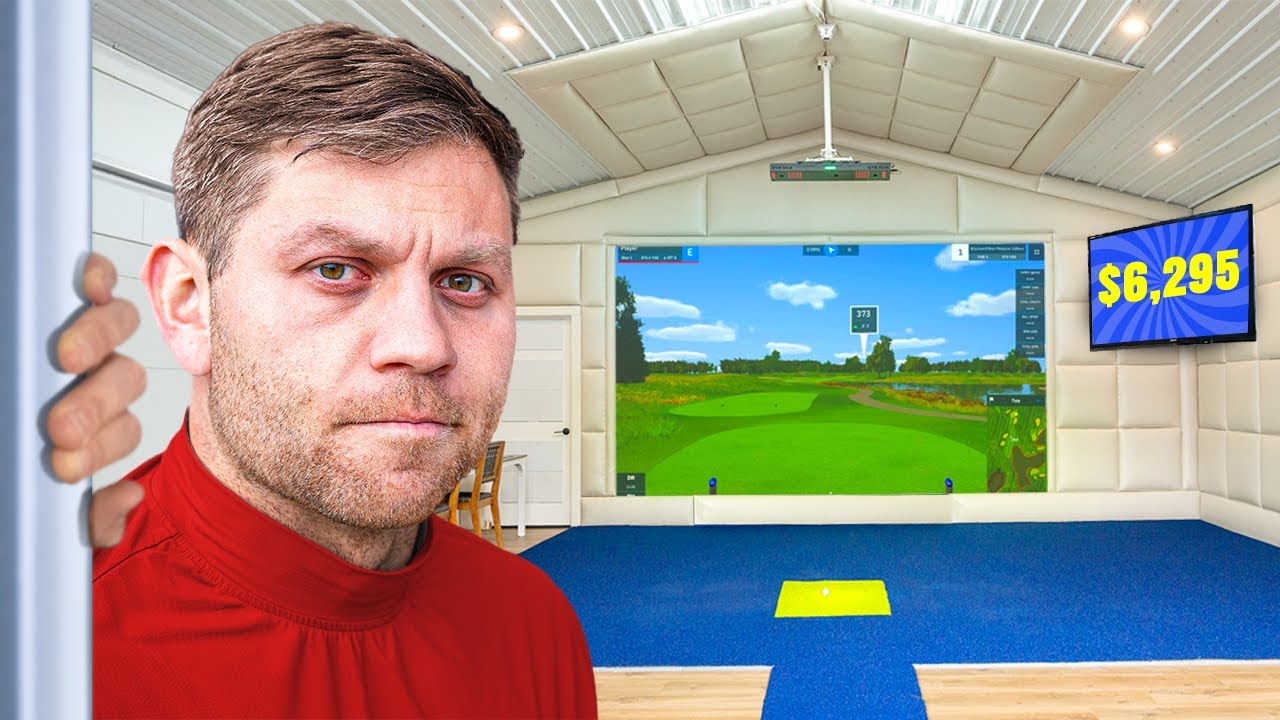
[Music] This is my dream home golf simulator. And three years ago, I built this thing for right around $6,000. We posted some of the longest hitters in the world. World 400. Holy crap. And as our channel’s grown, we’ve been sent nearly every single golf simulator product on the market. So today, I’m going to show you how to build this thing for the original budget of $6,000. I’m going to show you what more you could get with a proumer budget. And finally, if you want the best of the best, we’re going to show you how to build it on a premium budget. Let’s get into it. So, the first thing we’re going to go over is your flooring and your turf. So, the budget option, which is originally what we went with, was to find the cheapest turf possible for everywhere but the hitting zone. So, essentially what we did, we found turf on a closeout sale that still looked nice. Now, this turf, especially if you’re going budget, it doesn’t have to be awesome because you’re not hitting off of this turf. You’re just standing on it. So, I would get a turf that is cheap but looks good and you really want to spend a little more on the hitting strip. Now, once you get your turf, there’s another piece you need to get, and that is these 1in interlocking foam tiles. So, basically, these are just puzzle piece foam tiles, and all you do is you just connect them together. So, putting the flooring down, Ryan, is probably the one of the easiest pieces. So, what you’re going to do, you’re going to put these foam tiles down. Then, you’re going to lay your turf over top of it. And then after that, you’re going to use one of these electric cutters, or you can use scissors if you want it to take a long time. And basically just cut your line. Now, this turf is over 3 years old. So, you guys can see it’s held up great over 3 years. You don’t have to spend any more than that. But if you want to spend a little more, Ryan’s going to explain how you could take this from kind of your budget level to your premium level. All right. So, like Jock said, we in our simulator room here have the budget turf. We personally are against putting on a simulator cuz we don’t want to work on that aspect of our game in here. We would rather work on irons and drivers. But if you do want to putt, you can spend a little bit more and get like $3 to $5 per square foot on some premium turf to make it look a little nicer and feel better for putting. Now, before we move on to your hitting strip, we’re going to explain one of the most important pieces to laying these down, which is you probably want some carpet tape on two of the sides. So, the way we keep this in place and keep it from shifting is we just have a little carpet tape on the edges, which holds it down. Now, if you get more premium turf, it’s probably going to be a little heavier. You might not even need it. But, one of the things you are going to need is an expensive premium hitting strip. And we’re going to do that part next. So, this is the most important piece of your flooring, and that’s the hitting strip. We’ve tried a couple of different methods throughout the years. The first one was like this really popular divot action mat. It’s realistic. And honestly, guys, it’s not realistic at all. If you have one of those divot action mats that like bend down, the ball just floats in the air. It’s not like actual golf. So, what we found is best is just 1in thick turf. Now, we’re going to link our video on how to build this, but essentially all you need to do is get that one inch thick turf, get like a thin layer of plywood to kind of keep it sturdy, and you just got to make sure that the turf plus your plywood matches the height of the rest of your flooring. Now, once you’ve built that using our video, then what you do is you need to lay it on the floor and you just need to cut out your area. Now, very important. This part of the build is crucial because if you tilt it the wrong way and it’s not parallel to the screen, then you’re going to be aiming the wrong way on your simulator. So, take your time with this. Cut it correctly. It’s better to cut a tiny bit smaller to start cuz you can always make it wider than cutting too wide to begin with. So, we built our premium hitting strip by oursel, but if you guys don’t want to build your own hitting strip, there are hitting strips that you can just buy and place right down, and we have links and discount codes below for those. Next step we’re going to get into is the simulator enclosure space itself. So, what we did here in our simulator build was we did a custom build, but there are plenty of just traditional simulator enclosures out there that are honestly pretty easy, pretty cheap, and still look just as good that you can get. and we’ll link. Well, I wouldn’t say look just as good. Like maybe not just as good, but they they do look good depending what vibe you’re going for. But if you just kind of want that traditional simulator enclosure, we do have links for those below. But if you want to get into the custom ones, spend a little bit more money, spend a little bit more time, have it look nice and put some effort into it, we do have custom panels that you can build, which Jock’s going to get into next. So Ryan said this wasn’t the budget option, but let me be clear. If you build all these by hand like we did, it’s actually very affordable. You’re probably in at 1,500 to build this enclosure. But he’s right. If you do buy these panels, they become way more expensive. Now, that’s up to you, but we’re going to walk you through exactly how we built this enclosure. Starting with the custom vinyl panels, which really take your simulator from, “Oh, that’s cool.” to, “Wow, it looks incredible.” So, for these panels, they’re pretty simple to make. We have a video that’s going to show you specifically how to do it, which we’ll link right now. But essentially, all it is 3/8 plywood, egg crate foam, and marine vinyl leather. Then you basically just staple it. And it takes a lot of staples, and that’s why this was a grueling process. There’s like 120 staples per square. So, you’re going to want to get an electric stapler. Regardless, it looks incredible and is going to save you a lot of money if you do it yourself, but you can also spend the money to have these made. And we’ll link a company for that as well. Now, after you’ve made the majority of your wall panels or bought them or whatever, and I’m going to say majority of because generally when you’re making these or buying these, there’s going to be a couple of pieces that you don’t have the dimensions for until 90% of them are in place. Now, regardless, once you have built those, we actually need to build the enclosure. So, I’m going to take you behind our screen and show you how this was built. Now, I want to start by saying I was not a construction guy. So, while this may seem daunting, if I was able to do it, I think you can, too. So, what you’re going to do is you’re going to use 2×4 studs to build the frame. Now, what you can do is with these studs, you can just use constructive adhesive to bond the stud to the floor. If you want a little more sturdiness, there’s essentially screws that go into concrete through the wood that you can put in as well. Now, once you have that flooring, you’re going to basically build studs 16 in apart to build the rest of your frame. And what you’re going to do is you’re going to nail those in here to the base plate of your flooring. And then it’s important that when you get the end of it to a wall that that’s also kind of nailed in to keep it nice and sturdy. Now, once you put those studs in, all we used was OSB. So, again, we’re going to link all these products in the description for you guys. But once you have your OSB, you pretty much just screw or nail gun that in as well. And then yeah, that’s pretty much it. You’ve essentially built your frame. And then you just got to make space for the opening. So once you built your enclosure, just make sure to make room for your screen. So ours are on 16×9 dimensions. And the most important piece I want you guys to lock in here is that I would give a minimum of 9 ft of height at the top of your screen. I think if you go below that, you’re going to have a lot of issues with a 60° wedge hitting up on the screen. So, if I was to have built this again and I had the room, I would probably make it 16 ft wide by 10 ft high and I would just accept that I’m going to have a foot of white screen on the bottom. Or if I had enough room, I would go big enough that the screen was 10 ft high and it was still on a 16×9 dimension. Now, you can do like a 4×3 dimension, but we just think 16 by9 looks the most aesthetically pleasing. So, now that we have our frame built and we’ve talked through that, we have our wall panels. How do you even attach these things to the wall? Now, if you have room behind your wall, I would just screw them in. We just put four screws in and then we just made sure the length of the screw was not so long that it went through the wood of the panel. It’s got to get into the panel, but you don’t want it to go through it and essentially have a screw that could poke through your panels here. But if we didn’t have room to screw it from behind, what we did is we screwed Velcro into the wall, 2-in thick Velcro, and then basically just put Velcro on the panels and attached it that way. And this has held up great, and we’re super happy with it. Now, guys, here’s another listen close part of the build. One of the I don’t want to call it biggest mistakes, but things that could have gone horribly wrong is we didn’t realize these panels are more to protect your walls than to keep the balls from bouncing back. So, they do keep the balls from bouncing back, but if you look at a lot of other builds, it’s just a rectangle enclosure where every wall is going to bounce the ball back into the screen. Now, that’s not the case for us. So, if you notice, we have this bumper on the bottom here. And we originally when we built it, balls would come flying back way too fast. So, if I was to do it again, I would not have this bumper. I’d just have the screen go all the way to the floor. And I would just kind of loop the screen underneath the flooring and like velcro it or glue it down so that there was enough kind of space that balls didn’t come flying back, but it’s not so loose that like it looks bad, if that makes sense. Now, the final piece of the enclosure build is your impact screen. Now, if you guys have watched our videos, you know that we took a big risk. We found these kind of secret guys on Reddit that get you an impact screen like basically at the retail price, right? 50% off. And we just emailed these guys on Reddit. They told us to PayPal them. We PayPal them. We weren’t sure if the screen was going to come in. It did. And it’s been incredible. We’ve had this thing for over 3 years. I actually bought a second one a year ago cuz I thought this was going to wear out and it’s still going strong. So, this screen is three ply. It’s super sturdy. It’s held up great. So, all you need to do when you order your screen is you just want to get a screen that’s wider than your opening that you’re showing by about six inches on each side or a foot total. Now, once you get it, it’s super easy to attach. You have iHooks, bunggees, and tarp clips. And then you just tarp clip it together roughly every 18 in. If you have extra screen, all you need to do is overlap it. Now, it seems like we’re done, but there’s one crucial piece I need to go over, and that crucial piece is you need to make sure that your screen and kind of your coverage is wider than your opening. So, what a lot of beginners do is they don’t build an overlap of their wood stud frame. And basically, you just have exposed wood or you’ll have a gap between your screen and the side. So, if you notice right here, here’s the end of our stud. And we have this kind of panel that goes out about an inch and a half. And then we make sure that our screen, it’s basically wider than our opening so that there’s no gaps in the screen. All right, guys. Now, moving on to the next step, the simulators. First part, we’re going to start with the budget ones. If you’ve watched any of our videos, you know that our OG simulator, the MEO Plus, is one of our favorite, one of our go-tos. It was $1,800 to $2,000, and we’ve used it with plenty of guys over the years, and we’ve absolutely loved it. So, we’ve had plenty of the $20,000 simulator sent to us, but for the $2,000 Mevo Plus, we’ve had plenty of guys use it, and we feel like you get 99% of the experience, the accuracy, everything that you want with the Mevo Plus for just $2,000 compared to that $20,000. And now that leads us to the next one is MEO’s updated version, the Mevo Gen 2. So, this one’s coming in about roughly $1,100, $1,200 if you don’t really want some of that club data. If you want to spend a little bit more and get that club data, the pro package, the face impact, you can spend about $800 more. So, for 2,000, the same price as the Mevo Plus, you can get the Mevo Gen 2. And a couple of things I want to reiterate with the Mevo Gen 2. The Mevo Plus with those add-ons was actually closer to 2700 2,800. So, the fact that if you want a super accurate golf simulator experience without the club information data, you basically can get a device that works awesome for cheaper and then later on you can decide, hey, maybe I want more of that club information data or I want to see where the ball impacts on my face. You can add that on later. Now, if you guys want to get this as cheap as possible or any of the other launch monitors we’re going to go over, links below and the discount codes are below. Now, we’re going to move on to the proumer level options. But before I go over that, there’s a couple of budget launch monitors that are cheaper than the Mibo Gen 2. And I know some of you guys in the comments are going to be like, “Well, they’re cheaper. What about those options?” There’s a lot of good options that start at like 7800 bucks. But what you don’t realize with these other budget ones is they have subscription fees. So after a year or two, they’re essentially more expensive than what the Meibo Gen 2 will be. So even though over a,000 doesn’t seem like budget golf simulator, because there’s no subscription fees, we put it in that category. But if you guys want to spend a little bit more, there’s a couple of really good options in that proumer level price range, kind of $2,000 to $5,000. The first proumer option that we absolutely love is the SkyRack Plus, or you guys could get the new SkyRack Plus Max. Now, the reason I like this one, it’s again extremely accurate. Now, will this simulator every one in 70 shots have something that’s not perfect? Yes, it will, but so will literally every other device. And that’s one of the things I want to go over when you either watch our reviews or you’re making a decision. No device is perfect. There’s always going to be maybe one thing that is a con, but overall, this thing is great. And really one of the only cons to this is it’s not set up for lefties and righties easily like the Mibo Gen 2. This sits right beside you. So if you’re going to have lefties and righties over, you’re going to have to pick it up and move it basically every hole or every other hole if you get GS Pro. But for this being right around $2,000, we think this is a great buy. But if you guys want to go to the top of the proumer level price range, we got one of the coolest golf simulators we’ve ever reviewed. And coming in next is the Garmin R50. What we really love about this one is it’s a threein one. So not only when you usually get a simulator, you have to get a computer or a PC, the simulator itself, and a projector. This baby’s got all three of them in one. So obviously because of that, it’s going to naturally be a little bit more expensive. So this one’s coming in right around $5,000. Another thing that we really love about this, other than the fact that it’s a threein-one, is you literally need the Garmin R50 unit, a hitting mat, and a net, and you could take this thing in your backyard and have fun for hours out there, and that’s all you need. And not only that, but it’s also very accurate. We’ve tested this before. Love the accuracy, love the features of it. The only slight con that we would say is for righties and lefties, you do have to kind of pick it up and move it from side to side. Overall, just a great product. Three in one, very nice. And I want to highlight that lefty and righty thing because as a lefty, that’s something I highly consider. Now, if you do want to use these kind of side sitting devices with lefties and righties, the only program you can really use is GS Pro. And that’s because they have the play out hole option, which means instead of switching every shot, what you do is you play out the entire hole. So, if I’m a lefty with three righties, I play out the hole as a lefty. Then the righties all play hole one, the righties all play hole two, and then I play hole two and hole three. So, you switch every two holes where if you don’t have GS Pro, I don’t think the other simulator programs have that option, which means you’d have to switch it every shot. And at that point, guys, I’m not I’m not switching this thing every single shot. We’re just going with the Mibo Gen 2 or we’re spending a lot more and getting an overhead and it’s going to be good. Now, speaking of overheads, we’re going to move into the commercialrade golf simulators. We’re going to show you our favorite one. Let’s get into it. Now, our favorite commercial golf simulator that we have used for the last year is the Unicor Exo2. So, this hangs overhead and this is just top of the line. This is going to range kind of during Black Friday times anywhere from like 8 grand to 11 grand. I’m not exactly sure what the price point is, but no, like we said, if you use our discount codes and links below, you’re going to get the lowest available price. Now, the reason we love this thing, first off, lefties and righties, super easy because it’s overhead of you. Ginormous hitting zone, and it just has amazing accuracy and tons of features, which makes this just the best experience. Whether you’re running a commercial business, you’re playing golf with your friends in your garage, this has been our go-to. And I’m going to highlight a couple of reasons why. First off, like I said, the accuracy. Incredible. With all the devices I named before, you probably get one in every 18 holes a shot that you’re like, “Okay, that was off.” I can probably name on two hands the amount of times I’ve had a read on here that was like, “Oh, that’s for sure off.” Which is insane. We go thousands of shots where, right, Ryan, I don’t think we even question the like, it’s just you don’t even question it. And that’s how you know a device is top of the line is you’ve hit on every device. you know your yardages and you don’t question for a second the reading you’re getting. Now, the next thing I want to talk about is the features. So, if you want super accurate club data, you’re going to put these stickers on your club. And so, if you can see, not only do we get all these club data metrics, which just are awesome for diagnosing your swing, but you also get a slow-mo replay of the club through impact and a photo. And I cannot tell you how valuable that is. some of the other devices like the MEO Gen 2 for its price point is going to give you all of that same data. And so even though I can tell from the MEVO Gen 2, okay, that club path was 2.3° working left, there’s something about seeing it on camera that helps people go, “Oh, that’s what I’m doing wrong.” Now, like I said, this has been our favorite one, but we just added a brand new one, which we’re going to go even above commercial grade. We’re going to call it the PGA Tour Grade. And Ryan’s going to explain this next one. So, like Jo said about the Unicor Exo2, when we got all the buddies in here, we’re just drinking, having fun, hanging out. We love the accuracy about it. We never doubt it. But if you want to get to the 100%, no hesitation, no doubts. We got the Foresight GC quad. So, there’s a reason that the PGA Tour pros are consistently using this outside on the range because there is seriously no hesitation. You can 100% trust the accuracy in the numbers on this one. So, just to talk about some of the ball data and the club information, the difference between the Unicor Exo2 and the Foresight GC Quad Max for ball data is really no difference. They’re pretty much the exact same. We would say for club information with the Foresight GC Quad Max is a little bit more accurate and just kind of the top of the line there that you can 100% trust. And I kind of want to reiterate that a little bit like the Unicor Exo2 club data is really, really good. the averages are right, but probably like 10 to 15% of the time the club information data we’re not like 100% sure on. But we think the video replay kind of outweighs that. But if you’re like a club fitter, if you’re someone who’s trying to go pro and you want the just like no questions, like we said with the club information and ball information data, it’s the GC Quad Max. This thing, if I’m going to practice and work on my club path, making sure all those numbers are dialed, that’s the device I would use. And kind of like we said, the only downside, Brian, is kind of the lefty and righty play. You’d have to pick it up and move it every two holes with GS Pro. But like if you want an overhead option, they have the Foresight Falcon, which is the same thing but overhead. The only reason we didn’t go with that one, is because we really like the video replay and photo impact, which the Falcon doesn’t have. But again, if you’re a club fitter, the fact that this has no subscription fees, and some of the other devices do, I, as a club fitter, I would be going for sight and no questions asked. If you’re running a commercial business, it’s probably right. I’d probably go, if we run a business, probably Unicor Exo2 because of the a little bit cheaper price and just like the features that, you know, when you’re drinking with your buddies are awesome to have. All right, guys. Next up is step four, the projector. We’ve tested some projectors out before. The projector that we used in this build was about $1,000, and it was pretty solid, but we noticed a few issues where if like you had any lights on, it just became hard to see. And once we kind of spent that top dollar for a highquality projector, we just noticed insane differences. So Josh’s going to talk about what projector we have now and why we love it. So after the projector we got with this build, we were like, “Okay, it’s finally time to upgrade.” Cuz essentially, if we put on our lights for filming, the thing was like almost impossible to see. Now, one thing I want to go over on this camera, it’s going to look worse than it actually is. How lighting settings work on camera. when you expose lighting for people. The projector is always going to look worse on camera than it does in real life. But we upgraded, guys, to a Rico projector. And it has been incredible. For the first time ever, we can open our garage door to the patio and perfectly see the screen. We can put NFL football games on. We have a movie theater room. And it’s like amazing that we can have as many lights on as we want. It can be as bright out as we want. And the screen is crystal clear. So, the quality, ginormous upgrade. Now, if you guys are looking for Rico projectors, they are what we recommend. They’re top-of-the-line. They’re in the description, but one of the biggest things we have to go over is projectors are not just you buy one and it works. They all fit to a certain size. So, some of them have a little bit of play, but essentially, we’ve had a lot of people make mistakes where they buy a projector and it wouldn’t fit the screen properly. So, when you go with your Rico projector, what you want to look at is the throw ratio. And what that means is basically how big does the screen size get for how far away it is. Now, the best way to figure that out once you find a couple Rico projectors that you could like, look them up on projector central.com and then basically when you calculate the projector distance, it’ll tell you how far away does this projector need to be to fit the screen size. Now, what that means is you need to kind of measure what your screen size is going to be, and then you can figure out which Rico projector is going to work best. And then a couple of other tidbits that are important. The projector is going to want to hang essentially at the top of your screen. So, we’re going to link kind of the attachment things that you’re going to put into your ceiling to get a pole that drops down and connects to the projector. But, just know this is a crucial piece, guys. You can’t skip steps. And if you want to go with the best, Rico projectors are the best. All right, guys. Final step is the computer to run your golf simulator. Now, some of them don’t need computers like the Mibo Gen 2 or the Garmin R50. You don’t need them. Meo Gen 2, you could use a phone or an iPad, save money on a computer. The R50, it’s integrated, but for most of these, you’ll need a computer. Now, it’s very important you get one that is powerful enough to run programs. So, a good story about this is I had a buddy who I set up with a simulator. I sent him one of our cheap PCs and it wouldn’t run GS Pro. It like wasn’t powerful enough. It would keep disconnecting. So, we had to upgrade. Now, even though we built our computers, we’re not like experts on essentially the minimum graphics card or CPU or whatever that you need. So, to make it simple, we have linked computers below that will run these programs perfectly. And you can go with a cheaper one that’s going to run it on just kind of medium graphics, or you can go all out, get an expensive one that runs it at the highest quality graphics. All right, guys. And that is how you can build your dream home golf simulator on a budget, at a proumer level, or the premium way. If you have any questions, feel free to email us at [email protected]. discount codes and links below.
Every Product Shown in The Video + Discount Codes: https://docs.google.com/spreadsheets/d/10dQ5o7d9JkH9NG-LgPlDcevvBN9eztrTa_ja8H4eZqI/edit?usp=drivesdk
Want an Entire Golf Simulator $300+ off With Code Golfbusters10? Click Here: https://www.playbetter.com/collections/home-golf-simulator-studio-packages?ghref=2301%3A651919
In today’s video, Jock Buffton & Ryan Links walk you through how they built their dream home golf simulator for only $6,000. While the price makes it seem like its a budget golf simulator build, it is known as one of the world’s best home golf simulators.
Get our #1 Rated Golf Simulator Projector Here: https://www.pfu-us.ricoh.com/projectors/compact-laser-projector/sku/432673
Get our #1 Rated Budget Golf Simulator for the Lowest Possible Price Code GolfBusters10: https://flightscope.com/products/mevo-gen2?sca_ref=2830986.E8wPVjrbwy
Take our Golf Simulator Quiz to Find the Best Golf Sim for You: https://www.playbetter.com/blogs/golf/find-the-best-golf-launch-monitor-simulator-for-your-game-with-jock-from-golfbusters/?ghref=11569%3A651919#quiz-RbHyqJ
Uneekor Golf Simulators (The Golf Simulator we Use) 5% off Code GolfBusters10: https://www.playbetter.com/collections/golf-simulators?filter.p.vendor=Uneekor&ghref=11569%3A651919
Foresight Falcon and GCQUAD $750 Off Code GolfBusters10: https://www.playbetter.com/products/foresight-falcon-golf-overhead-launch-monitor?_pos=1&_sid=974f79bdc&_ss=r&ghref=11569%3A651919
Email us if you have any questions: GolfBustersOfficial@gmail.com
Join our Reddit Community!: https://www.reddit.com/r/GolfSimulatorDIY/
________________________________________________________________________
Flightscope, Bushnell, Full Swing, SkyTrak, Foresight, and Uneekor are companies that develop golf simulators aimed at helping both new and professional golfers improve their swings by providing real-time feedback and staying at the forefront of golf simulation technology.
The Best Golf Shoes We’ve Ever Owned:
https://amzn.to/3ZbxBJI
DIY Turf Strip: https://www.youtube.com/watch?v=MLkNTk5ftGQ&ab_channel=GolfBusters
Custom Wall Panels: https://www.youtube.com/watch?v=AWXE316klaA&t=1s
Some of the links above are for affiliates. I may receive a commission for you signing up for the platform.
#golfsimulator #diy #budget
Time Stamps:
00:00 – Intro
00:34 – How to Build Your Flooring
03:55 – How to Build Your Enclosure
10:58 – Best Launch Monitors for Budget, Prosumer, and Premium golfers
20:21 – How to Choose a Projector
22:47 – Choosing your PC


8 Comments
Get our #1 Rated Golf Simulator Projector Here: https://www.pfu-us.ricoh.com/projectors/compact-laser-projector/sku/432673
Get our #1 Rated Budget Golf Simulator for the Lowest Possible Price Code GolfBusters10: https://flightscope.com/products/mevo-gen2?sca_ref=2830986.E8wPVjrbwy
Get our #1 Rated Premium Golf Simulator for the Lowest Possible Price Code GolfBusters10: https://www.playbetter.com/collections/golf-simulators?filter.p.vendor=Uneekor&ghref=11569%3A651919
I work with a company that does high end home and commercial installs. And I built my own garage sim (3 times!) So I have seen both extremes. You can get a great home sim doing it yourself assuming you have some knowledge, patience and time. I did 5 years ago during the pandemic. Does my sim look "finished"? Hell no! lol. But it functions. If I was doing it today, being so busy with my main job and helping others design their sims, I have no time at all. And one of my helpers, my oldest son, is 2K miles away in school now. He was instrumental in helping us figure out the electric Sportscreen we installed in v3 of my sim. 2 days of torture….I mean family time!
And many people overlook the hitting strip. Glad you covered this. i have gone through 10 different brands looking for the perfect one for me. Every swing is different and some hitting mats will be great for some and will wreck joints for others.
Oh…my original cost was probably $1500 as I used things I had around the house already and a very cheap LM type device from Rapsodo called R Motion. But at this point I am easily over $25K with what I have installed. Different software, much better LM, new 14' custom electric screen, very high end PC…..countless mats!…. Again, wish I had done it right the first time but it was much harder to understand all this stuff 5 years ago
Great video and hopefully this helps people decide how much their time is worth if they do this themselves. Something can be said about blood, sweat and tears, but having something go up in 2 days and be perfect on day one if someone else does it is where I would be these days!
Did that guy in the grey shorts lose a bet or something….those are uncomfortably short
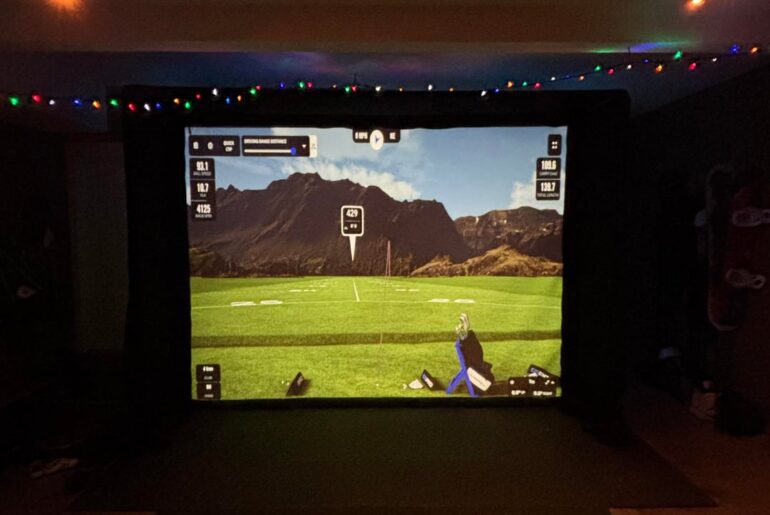
Does the picture on your screen was edited, because it look very sharp. But some of person shot with screen on back ground it look a lot datker.
Now let's stop setting the elevations at a million feet above sea level with a 30mph tail wind.
Makes me wonder if someone has used SOD for a hitting strip and set it up to keep the SOD alive. Wouldnt last long but still makes me wonder
what about using a thinner foam than the 1"? Would I notice much difference?
Who on Reddit did you buy your impact screen from?