How to Plan ANY Golf Simulator Room (in 10 Seconds)
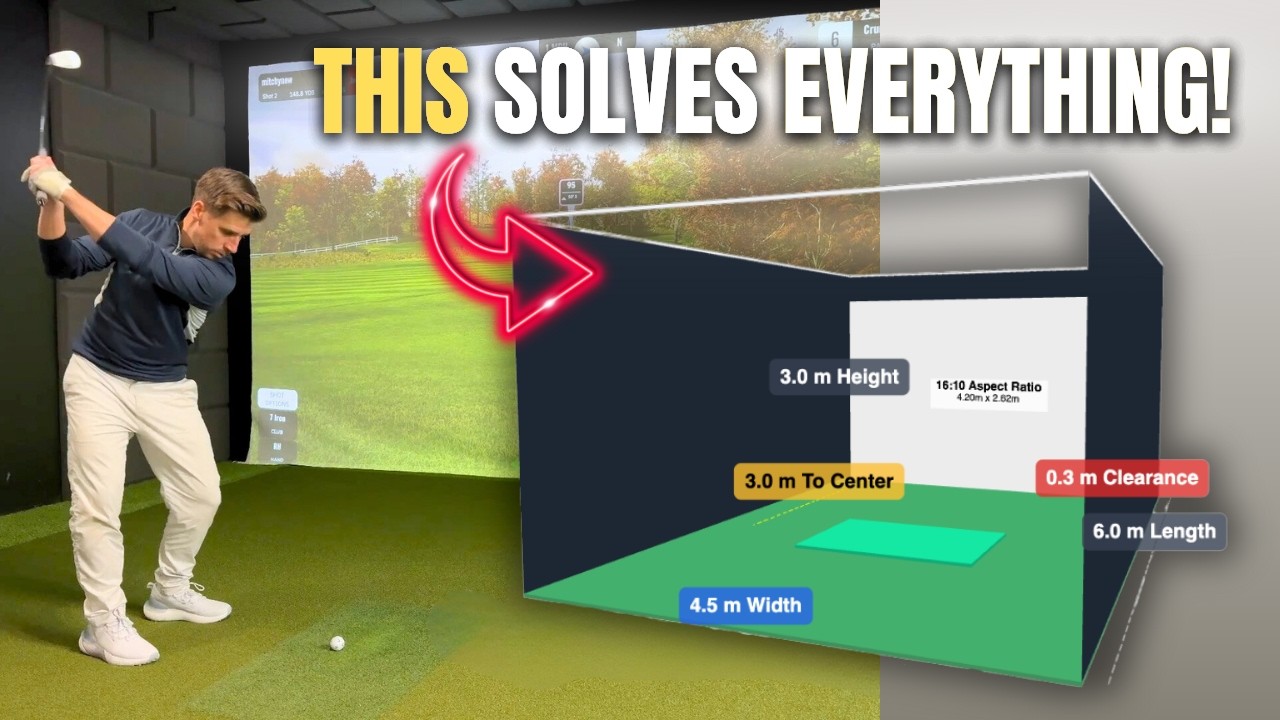
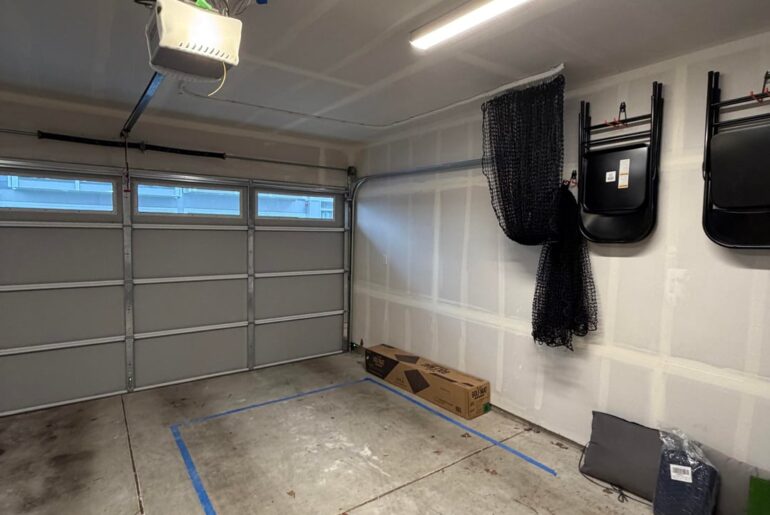
Most golfers waste hours guessing whether a golf simulator will even fit in their room. But what if you could plan the perfect golf simulator setup with just one click? I’ve built DIY simulators in tiny garages and full luxury studios. And I know how confusing it can be to figure out what size screen you need, what aspect ratio is going to fit best, or how far back your hitting mat needs to go from your screen. So, I’ve built a very simple tool that does all of that for you. Just enter your room’s height, width, and length, and it instantly shows you the perfect setup. But from my experience, I’ve learned one huge impact screen tip that I would highly recommend to anybody that’s building a DIY golf sim. And I’ll reveal what that is a little later. Now, just for reference, the ideal size of a golf simulator room is 2.9 to 3 m high, which is about 10 ft high, 4 1/2 m wide, or 15 ft, and 6 m long or 20 feet. But as you’ll soon see, you don’t have to have those dimensions because you can go smaller than that. Now, I’m going to demonstrate exactly how this tool works using my current luxury golf simulator room as an example, which has plenty of space, but I’ll also show you how it works if you have a smaller space like my old tiny single garage setup that I used to have. because if I can build a golf simulator in there, you can build a golf simulator in the same size room. Okay, let me take you inside my online course. And if we head to the planning stage and we head down to 3D golf sim room planner, all we need to do is click on this link and it should open up the tool. This is cool. Wait and see. So, here we go. 3D golf simulator planner. Now, as you can see at the top, you can input your room dimensions. So, we can change it from meters to feet, whichever one you prefer. And down here, we’ve got a cool little 3D model that we can move around and we can zoom into and so on. Now, because the room dimensions I’ve got at the top are the ideal room dimensions at the moment. So, 6 m of length, 4 and a half meters of width, and 3 m of height. Or for you guys that like to deal in feet, there you go. There’s your equivalent. Now, because I’ve got those dimensions, it says at the bottom, dimensions are ideal or greater. So, if you’ve got these room dimensions, it is perfect. If you’ve got bigger than these room dimensions, that’s also excellent. So, we’re going to use my golf simulator, my current golf simulator space as an example. Now, I have got exactly 6 m of room length. I’ve got 5 m of room width, and I’ve got 2.9 m of room height. Now, it says here that my my dimensions are ideal or greater. Yep, 3 m ideally for height. I’ve got 2.9. It’s not too bad. You can get away with that. But if I zoom in onto my 3D model, straight away, you’ll be able to see it tells you 16×9 aspect ratio is going to be the most suited aspect ratio for my space based on the height and width of my room. And that’s exactly what I’ve got. I’ve got a 16×9 aspect ratio golf simulator screen set up. It even tells you the dimensions of the screen as well. So, it’s going to be a 4.7 m wide screen by 2.64 m high screen. Now, just to let you know, the screen size that it’s showing you on here is accommodating for the gaps that you have to leave at the top and down the sides of your impact screen so that you can attach it using bungee cords or zip ties. Now, usually we say leave a 10 to 20 cm gap along the top and down the sides just so you can do that and you’ve got a little bit of room to play around and adjust the tension of your impact screen so that you can get it nice and flat and smooth, but also not have it too tight so that it bounces so that the balls bounce back and you get those ricochets. Now, what you’ll also see is the red box here and that says 0.3 m of clearance. Now, what that’s talking about is the gap that you need to leave between your back wall and the impact screen. Now, it says 3 m, but if we change that to feet, it’s going to say a foot. So, that is usually the recommended distance that we leave from the impact screen to the back wall to protect the golf to protect yourself really from any golf balls that you fire into the impact screen. If it was too close to the back wall, then the golf balls potentially could come ricocheting back towards you. But if you’ve got a foot of clearance or.3 of a meter of clearance, then that is usually plenty of space. And then the final thing that it calculates for you, if we zoom into the yellow box here, it says 10 ft to the center. I’m just going to put it back to meters just for continuity sake. So it says 3 m to the center. Now, what that’s talking about is how far away your hitting mat needs to be from your impact screen. So, as you can see, the dotted yellow line is going to the center of your hitting mat. So, this is where you are going to hit the ball from in relation to your impact screen. And as you can see, because I’ve got a good amount of width, an ideal amount of width or more, then my hitting mat is mounted in the center of the room. So, the ideal distance for the hitting mat away from the impact screen is 3 m or 10 ft. You don’t really need to go any further back than that. But as you’ll see in a moment when I change the dimensions in relation to my old simulator room, some of these um dimensions and stuff start to change. So, let’s check out what it’s like if we have a smaller room for our golf simulator. My old garage golf simulator setup was tiny. The length of the room was only 5 m, the width was only 2.5 m, and the height was only 2.4 m. Now, if we scroll down here now, you can see straight away that we’ve got a little warning at the bottom. It’s basically telling you that the height and the width are below the recommended dimensions. It’s saying that you need to just do a little bit of testing first. It says before finalizing any of your plans for a golf simulator, you need to perform a full swing using an alignment stick inside your room. basically just to physically test out your space and see if you’ve got safe clearance for all of the clubs inside your bag. Now, importantly, it says due to the limited space, you might not be able to swing all of the golf clubs in your bag. So, very much like my old setup, I could only swing up to a sixiron inside my room. Now, this is going to vary depending on you and your height and the steepness or the shallowess of your golf swing. Okay? So, all you can do is take an alignment stick into the room that you’re planning on building a golf simulator and swinging it and see what kind of clubs you can swing safely. So, that’s the warning out of the way. Let’s dig into the 3D model. So, if we zoom in here, straight away you can see that the shape and size of the impact screen has adjusted to the size of my room dimensions. Now, it’s saying here that the impact screen in this smaller room would need to be a 1x one or a 1 one aspect ratio, which is effectively a square impact screen. And that’s exactly what I had in my old setup. It’s saying that the height of the impact screen should be 2.2 m, the width should be 2.2 2 m and that would allow me to project a great image from my projector. So, it doesn’t leave any empty spaces or overfill the screen in any particular areas. Again, we’ve got the red box that says.3 m of clearance, which is just the gap from the impact screen to the back wall. And now, if we zoom out a little bit, you’ll be able to see that the yellow box is saying that the hitting mat should be 2.1 m away from the impact screen. And what you should also notice is that the hitting mat is actually not in the center of the room anymore. It has been shifted slightly to the right hand side. Now we call this an offset. And the reason is because the room is now too narrow to be able to swing from the center of the room. So we’ve had to shift it over this side a little bit just so when we do our back swing, our golf clubs are not going to come round and hit the wall that’s directly behind us. So the center of the hitting mat needs to be 2.1 meters away. I’m just going to change that up to feet just to make it a little bit clearer for some of you guys that would like to work in feet. So in a small room like this, then we’ve got 1 foot of clearance behind the impact screen. We have got 7 ft to the impact screen from your hitting mat. And just to note, that is probably the closest that I would go. I wouldn’t go any closer than that. And even when you go to 7 ft, if you’re able to swing driver, you’re going to have to check that your driver swing isn’t going to hit that impact screen or the side protection as you do your follow through. So again, it’s very much a trial and error for your golf swing. This 3D Sim Planner is just giving you an idea of what kind of dimensions you might be able to get away with. Now, of course, you can play around with this with your individual room sizes and dimensions. So, if you are interested, like I said, you can get this 3D SIM planner inside my online course, and I will leave the links to my online course in the description below. I’m sure you’ll agree it’s a really handy tool, and it could save massive headaches for you if you are thinking about building a golf simulator, but you aren’t too sure whether it’s going to fit inside your space or not. Now, this is just one of the things that I’m introducing into my online course about how you can build a DIY golf simulator and save yourself a little bit of money and a lot of time whilst doing it. I’m constantly trying to upgrade and improve this course and getting feedback from the people who have already enrolled to it. So, yeah, definitely sign up if you’re interested in building a golf simulator because it’s going to save you loads of time and hopefully quite a lot of money in the process as well. Now, whilst we’re here, I might as well show you the rest of my online course. So, down the side here, we’ve got all of the different sections uh when it comes to building a home golf simulator. So, we’ve got the planning stage, obviously, got launch monitor section, hitting mats, flooring, computers, projectors, everything. So, within each section, there is a little video just explaining exactly what you need to look for when it comes to each component. So, there’s a section about projectors there. I’ve got a section about launch monitors, understanding launch monitors, and how to choose the right one for you based on your room size and your needs and all of that sort of stuff. All the way to how to build a DIY wallto-wall enclosure or how to build a freestanding uh enclosure. So, yeah, we’ve got absolutely everything inside this golf simulator course that’s going to make it so much easier. It’s just a step-by-step guide explaining how to build one. and most importantly how to understand every component so that you know what to buy and you don’t waste any money whilst doing that. Now on top of it all you get access to my ebook that you can download that’s full of discounted links. If you get in my whole package you can book in for a one-to-one call with me and you can also join my Discord community for some ongoing support as well. So, like I said, everything you need to know regarding how to build a home golf simulator is inside that course if you’re interested. The links are in the description below. Now, I promised you earlier a huge impact screen tip that I would highly recommend for anybody that’s building a DIY golf simulator. And what that is is yes, if you’re building a DIY golf simulator, you can find um an impact screen that might be bigger than your space and you can fold it over. You can use uh tarp clips and bungee cords to attach it and all that sort of stuff. And that’s absolutely fine if you’re building a golf simulator on a budget. However, if you want to get more of a professional look to your golf simulator, I can’t stress enough how important it is to go and get an impact screen from a golf simulator reseller who deals specifically in impact screens. All you need to do is tell the guys that you’re buying it from what your room dimensions are in terms of height and width and they will cut it for you. But not only will they cut it for you to the perfect size, they will install the grommet holes and they will also more than likely stitch the Velcro into your impact screen, which is going to be very important for the final look and finish of your simulator. Because in the past when I had my own go my old golf simulator, I didn’t have any black borders around the top and the sides of my impact screen. And it took me a long time to try and figure out how to make that look neat and hide the bungee cords and the tarp clips and all that sort of stuff. And it was only when I built this golf simulator, well not this one behind me because this is sim spaces, but my main golf simulator setup when I’ve got the pelmets that cover those t that cover those zip ties that provides such a neat finish to your golf simulator. And it really does finish it off because if you don’t have these little black borders around the edges, then your zip ties or your bungees and your tar clips going to be exposed. It looks scruffy. It looks tatty. And if you’ve got the Velcro installed on your impact screen already, and then you can buy the pelmets from usually the same place where you get your impact screen from, it’s going to be a much simpler task. And yes, you might pay a little bit more money in order to get the impact screen cut to size and with everything installed and stuff, but I’m telling you, it’s well worth it if you want more of a professional finish. because more than likely if you build a cheap DIY simulator setup, then in the future, you’re more than likely going to want to upgrade it the more and more that you play on it. So, my suggestion is to kind of just bite the bullet once, get it done and dusted, and then you don’t have to think about it or worry about it again. I hope that’s been helpful. If it has, please subscribe to the Handicap Golf YouTube channel for more golf simulator tips and tricks and reviews and advice and all of that sort of stuff. And then if you want some more information about how to build a professional looking golf simulator, check out this video on the screen right now. And I will hopefully see you over there in a moment.
⛳️ Use my Sim Planner tool & build your DREAM home golf simulator https://mitch-s-site-003e.thinkific.com/courses/golfsim
___________________________________________________________________________
Learn how to plan & design your home golf simulator room, based on your bespoke room dimensions, using my 3D Sim Planner tool.
___________________________________________________________________________
📩 For brand partnerships contact mitch.hcpgolf@gmail.com
#golf #golfsimulator #golfsim


2 Comments
I’m sure you are looking at your metrics and such, and would know much better than me. But I really wish you would move on from the How To videos and focus on challenges and playing courses. I feel like these How To videos are just rehashing everything you’ve said over and over. Just my opinion.
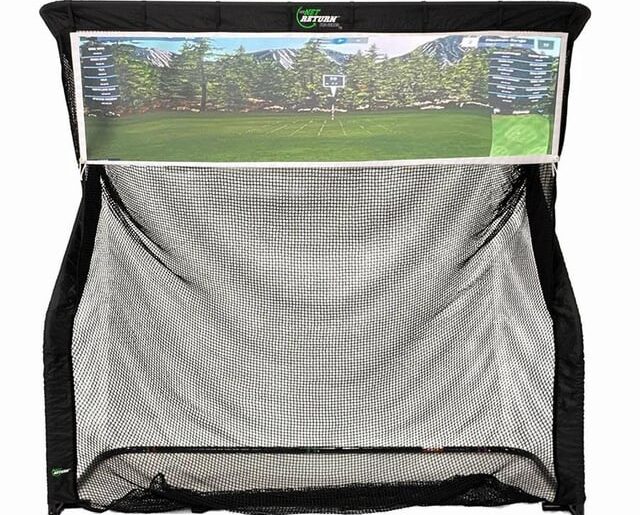
How do you like the simspace enclosure? And does it come with some type of padding on the back poles to help with ricochets?