EARLY BLACK FRIDAY DEAL 20% off
🎯 Hack Motion – https://www.hackmotion.com/chrisryan
Most golfers have been taught the release completely wrong — and it’s ruining both their distance and accuracy.
In this video, I’ll use the HackMotion sensor to show you what really happens in a great release — and why trying to “keep the lead wrist flat” through impact is one of the biggest myths in golf.
You’ll learn a simple 3-step process to train the perfect release — one that delivers effortless power, square contact, and pure strikes with every club in the bag.
Whether you tend to flip, hang back, or lose compression through impact, this video will help you finally understand how the wrists should move — and how to train it the right way.
🎯 What You’ll Learn:
Why most golfers misunderstand the release
The key move your lead wrist must make through impact
A simple drill using HackMotion to groove perfect release patterns
How to build both accuracy and speed without manipulation
📲 The Chris Ryan Golf Academy App
The all-in-one coaching platform designed to help you train smarter, practice better, and play your best golf! 🎯
✅ Structured training plans
✅ Fun & effective practice games
✅ Exclusive content not on YouTube
Start your 7-day free trial today! ⬇️
🔗 https://www.chrisryangolf.com/chris-ryan-golf-academy-app/
⛳ Want to Play Better Golf?
Join me on the journey to lower scores and more enjoyment on the course! Don’t forget to LIKE, COMMENT & SUBSCRIBE for weekly golf coaching videos.
💬 Got a question? Drop a comment below – I read them all!
📩 Want to work with me? Email: chris@chrisryangolf.com
🌍 Visit My Website: www.chrisryangolf.com
🎥 Want Personal Online Coaching?
If you’re serious about improving, I offer personalised online coaching to help you reach your goals faster.
🔗 https://www.chrisryangolf.com/online-coaching/
🤝 My Trusted Partners
🔥 TaylorMade Golf – https://www.taylormadegolf.eu
🏌️♂️ Clubhouse Golf – https://www.clubhousegolf.co.uk
🎯 Hack Motion – https://www.hackmotion.com/chrisryan
📡 FullSwing – https://www.fullswinggolf.com
📱 SwingCoach – https://inf.getswingcoach.com/CHRY232
🎯 PuttOut Golf – https://www.puttout.golf
👟 Adidas Golf
🔧 Mapei – https://www.mapei.com/GB-EN/
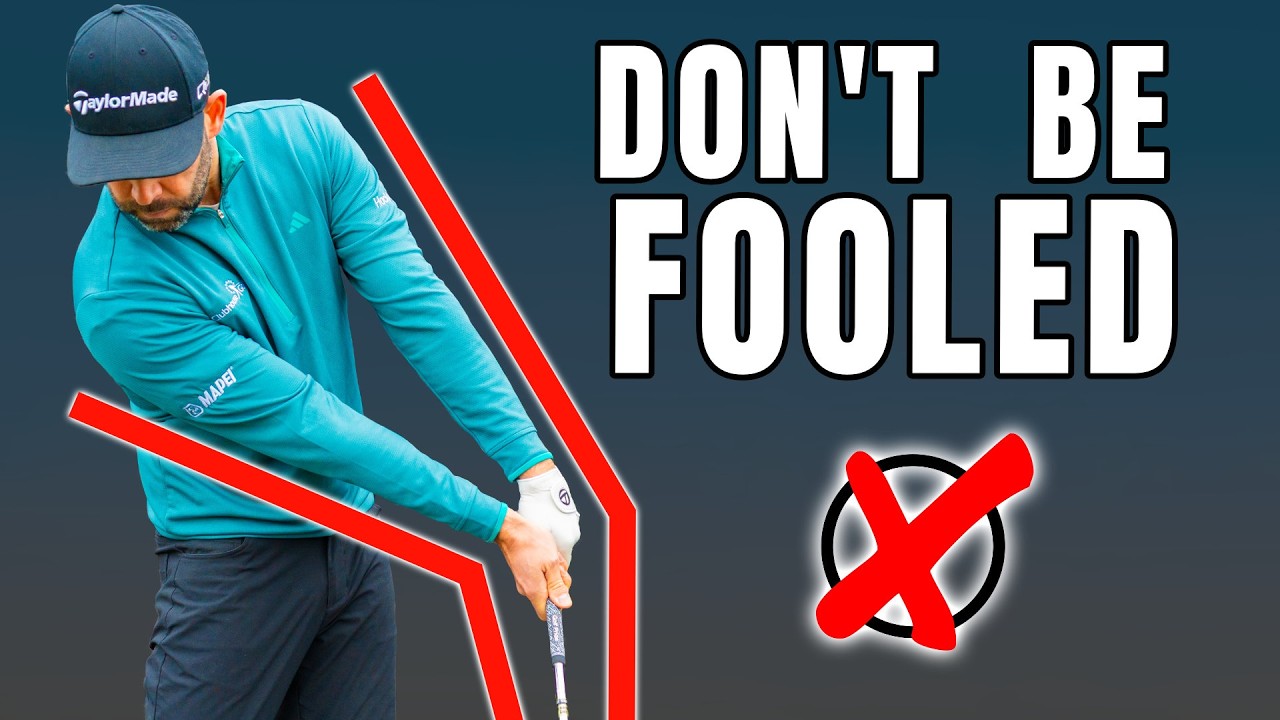
Worldclass golfers like these all have a flat lead wrist at impact with the irons. It’s key to ball striking. But if you’re trying to keep your wrist flat through impact, that is terrible advice. So, in this video, we’re going to take a deep dive into that lead wrist. We’re going to show you exactly what it does, how it should move through impact. And I’ve got some really, really simple drills which you can use to help you feel and sense what this is like and apply it to your game. So, let’s take a look at the data. So you can see my wrist at impact minus 19 and that’s slightly arched but I mean pretty damn flat. So I did achieve that flat lead wrist at impact. However, when we take a look at the graph you can see that through the impact phase that line which is measuring what my wrist is doing is going down and then up which means that through impact my wrist is actually doing this throughout that motion. And when we look and we scroll through the graph, you can see the numbers at the top. You can see it going from plus down towards zero down towards where it was at impact and then back up towards a positive. So through impact, my wrist was doing this. Yes, it was flat at the point of contact, but it was moving in this fashion. That’s a big myth. Most golfers don’t think that should be happening. So just out of interest, let’s hit a shot where I’m trying to keep my wrist flat through that impact area. Ah, well, it was straight. I mean, it was pretty much on the line. The last shot I hit 186 yards carry 86. It’s easy for my maths. 100 yards short. So, what was it like at impact? The same. It was minus 19. So, I got this wrist flat at impact. But you can see based on the graph that I tried, not even that successfully, but I tried to keep it flat. And relative to the previous graph, it is flatter. there’s less of this happening through impact. So I kept my wrist sort of flatter through that impact phase. So we need to understand that whilst the wrist should be flat at impact, it’s never staying flat. So the first thing we’re going to do got hack motion on and when I can put my wrist into a pretty flat if not a little bit arched position, we’re going to get that audio feedback. That’s my setup position. But what I want to be doing when I get to delivery position here, I want to have that club face pointing a little bit down towards the ground. You can see that at the moment, as that club face is pretty vertical, we don’t have the audio on because my wrist is slightly cuped. When I can point that face down, we get the noise. This is my pre-impact position. Turn off for a moment. So, I want to be working down to a delivery where the club face points slightly down to the ground. I want you to practice this. So, what you’re going to do, you’re going to very simply go up to the top of your back swing delivery face points down. If you do that, I’ve got the audio feedback, but that will tell you that you got this lead wrist into a pretty good position. Now, in this first drill, I’m actually going to get you to do what I’ve told you not to do, but it’s stages. It’s part of the process. What I’d love you to do is get yourself into that position here and then see if you can work the club down to impact and post impact keeping that wrist in its position. You can hear that noise is still on. Now, that’s not what happens in a golf swing. We’ve already explained that, but it’s a great way to practice. I love this drill as part of a bigger practice session. I don’t love that drill on its own. Well, when we do it in the way I’m gonna explain in this video and we add the second phase, it’s incredibly powerful. We’re gonna go find it. There’s my audio, rehearse it, rehearse it. You can see I’m keeping that wrist flat. Collect the ball. And look at the shot we get. Beautifully straight, very low. Wrist is still in that flat position. Now, why am I getting you to do that when at the start of this video I’ve told you that’s not what happens? Well, because when you do that exercise, number it does two things. Number one, it first of all teaches you where that wrist needs to be here, which is really important. Just going to turn that off for a moment. Number two, what it gets you to appreciate is that from here, if I don’t move my body at all, there’s physically no way of me getting the club to the ball with that wrist in its position. So many of you get the wrist cuped at impact or the impact position is poor. Maybe not because you’re incorrect here, but because the body pivot isn’t right. So when we do this little exercise, it trains you to get wrist good. But look at how much I’m having to use my body to transport that club from delivery to impact. No body turn. I can’t do it. I start to go wrists early and you can start to see what kind of impacts we’re going to get. really extended wrist. That’s not what we see break players do. And the elbows tend to separate. So, this little exercise here, body turns, is really, really good to get you to understand how to position the club and how the body moves. Now, let me show you how you can do it with an alignment stick. Grab yourself an alignment stick. Mid iron is ideal. And you’re going to go alignment stick down the lead side of the handle. And you’re just going to make your best attempt to take your grip. is obviously going to feel a little bit strange. Then what you’re going to do at setup that alignment stick is going to go up to the left hand side of your body and you might find that you have to have a little bit more kind of forward shaftling than what would be normal. But if we use the alignment stick to help us with that drill, we haven’t got the hack motion on now, so you won’t hear the the feedback. But as I get to delivery, I can position that club where I want it to. But if I don’t use my body and I start to have to extend that wrist, the alignment stick is going to make contact with me. So, what we have to learn here is I can use this alignment stick as my feedback. Notice how I can move all the way through impact into my follow through and the alignment stick hasn’t made contact with me. You should be able to land the club target side of the ball and hit shots that go, you know, relatively short distance without the alignment stick making contact with you. That was pretty similar to the previous shots I’ve hit. Low, pretty straight. alignment stick didn’t make contact with me. So, if you can execute this drill, it’s doing those two things for us. It’s telling us that you’re positioning the club face and it’s telling us that you’re using your body pivot correctly. So, what we’ve now done is we’ve learned where our wrist needs to be pre-impact. We’ve learned how the body needs to pivot through impact. We now need to learn how to release this wrist to give us all of that power back and give us all of that height back that we need when we actually play golf on the course into my follow through. So just post impact my wrist is extending and then at some points into the follow through it’s pretty much as extended as it can be. And when I get to that point we get the audio feedback again. So flat we’re not going to hear anything. Arch we’re not going to hear anything but extended we are. Think of your target. Obviously for me it’s the it’s the screen here in the full swing sim but it could be the the driving range or even a wall wherever you’re doing this hand is going to go down lead hand only. You’re now going to put yourself into that position. Notice how it’s slightly arched. We’ve already trained that. But as you swing through, I want you to take the palm of your hand and I want you to point it at the target. So thinking about what we did previously, we held that movement all the way through. So look where my palm faces kind of back towards me. If I pointed my palm towards the screen, the noise comes on because I’ve moved from arched to extended. So my little exercise would be to position it here. Now I’m going to add some real speed. I’m going to add this body pivot. I’m going to go through and point my hand at the screen and we get the audio on. And then what we do is we simply bring the golf club in. And we’re going to now add all three elements together. We’re going to get the club in position. That’s really important. We’re going to get the body pivoting and we’re going to be moving through into our position in the follow through. Now, I’m going to do this at fairly slow speed, but straight away we should start to see the distance come back and some of the height come back as well. Body pivots. Body pivots. Le palm of the screen. Okay. And you heard the noise come on and we start to get the balls heading back towards where we’d expect. And that wasn’t quite at full speed, but you can see the distance is back. We’re already back up to 150 yards. Okay, you heard that noise come at the end. Good shot. Slightly right of target. And when we look at the data, what do we actually get? But you can see there that impact it was minus4. So it was pretty flexed. Well, pretty flat at impact, which is perfect. I got it flat at impact, but it was arch pre-impact.


8 Comments
Release the Epstein files instead
Are you saying that during the follow through, on a full swing, that the alignment stick should not come into contact with your lead side?
These Hackman motion vidz are gay
Promoting that stupid device is shameful to your channel!!
Very good Chris but not all of us have the time and the funds to buy gizmos like this.
I would have liked some discussion about those RD/UD numbers it showed at the very end.
Wow bit of a tough crowd this morning Chris 😀…Thanks a lot for this lesson and I tried the drills this morning on the range but when I make a half swing and consciously think about turning my left hand knuckles down all my 8 and 9 iron tee shots hook to the left…Only clubs I used.Any ideas on what could be wrong?
what about lead arm supination through impact?