How to Build Your Dream Home Golf Simulator on a BUDGET!
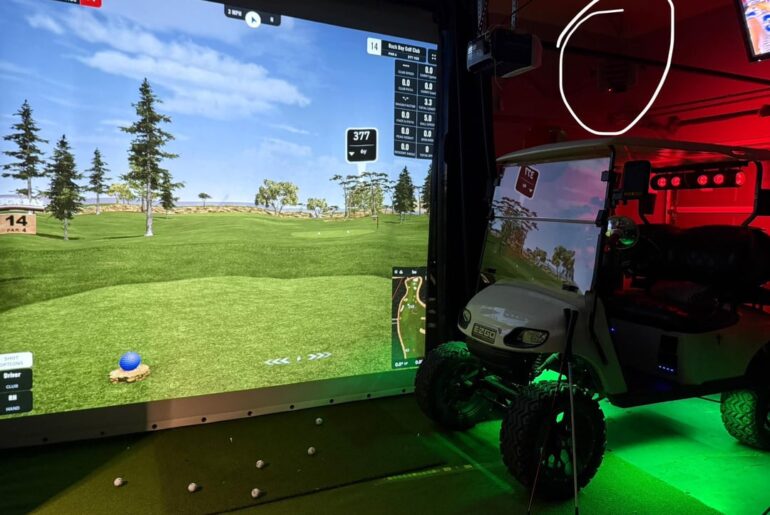
This is my father-in-law’s garage. Pretty nice on the outside, but on the inside, it’s an absolute mess. So, today we’re going to be transforming this messy garage into his dream home golf simulator. And we’re going to be showing you guys how you can build your own dream home golf simulator from scratch on a budget in five easy steps. Let’s get into it. Now, before we get into step one, I want to tell you guys this is going to be different than most of the videos coming out right now. The other videos coming out right now are going to be more pre-built enclosures. So, no, when I say we’re showing you how to build a custom premium DIY build, that’s what we mean. We’re going to be showing you how to build this in your own place from scratch and it’s not a pre-built enclosure. So, with that being said, let’s get into step one, how to build the enclosure. All right, so step one is determining how big do you want your enclosure to be before you build the enclosure. So, minimum space for a golf simulator would probably be 11 feet of width, 9 and 1/2 ft of height, and 16 feet of depth. Now, we’ve gone a little bit bigger here. We have about 14 ft of width. This room is kind of endless on the depth. And then we have 10 ft of height. And then we built this structure to fit the dimensions that we’re talking about. So, we’re going to show you how to do this part if you’re someone who’s not really experienced in kind of home projects. So, basically, you get 2×4 studs, right? And then how did you build the structure to put the OSB over top? How does that work? Yeah, so it’s studs that are uh two 2x4s 16 inch on center and then glued to the ground and then up and then kind of built the wall kind of in in in a way that it would be solid on the other side of this wall or shell is shelving. So it gives it kind of a solid um a solid back backdrop. You can actually see here guys, it’s just a basically a 2×4 stud that goes all the way across the ground. It’s glued, right? Construction adhesive, right? And then to get the other studs in, do you nail those, screw those? What’s the Yeah. So, you put your base plate down and then the wall uh two 2×4 studs, you are nailing them to kind of the bottom plate and then the OSB kind of combined with the shelf gives it kind of just a a really solid I don’t know what the word is, but just, you know, so it so it doesn’t move on you. Right. Right. And then you nailed the OSB in. Right. Cool. Now, one of the things I want to go over really quickly is you’re going to see there’s no space for the screen. Because my father-in-law put the shelving behind it, he wanted that back part to be a solid wall, but he could have just built in an opening for the screen right there. But because he didn’t, we’re going to build the space for the screen about a foot offset from the wall. And all he had to do to build that space for his screen was run studs up the side. And so, basically to do that, all you need to do is construction adhesive on the one side of the stud. So, you glue it to the wall and then you’re going to nail or screw in those studs to build that frame. And then last but not least, to build the ceiling, one, make sure it’s 10 ft off the ground. If it’s not going to be 10 ft off the ground for your ceiling, I would only go like 5 ft out with that ceiling. And then what you’re going to do is just build a frame similar to what you did for the back wall. And you’ll attach it using the same methods we’ve shown earlier. So, what we’re going to do now is we’re going to start putting these vinyl custom panels onto the enclosure to kind of finish out that part of the build. Now, we’re going to show you guys how to build these in a little bit. If you buy these pre-made, they’re extremely expensive. If you build them yourself, they’re timeconuming, but save you a ton of money and look awesome. I think these are the pieces that take a simulator from, okay, it’s cool to it looks incredible. And so, we’re going to do that now, and then we’ll show you guys how it works. All right. So, first step to get the panels onto the ceiling part. Basically, what Ryan and Tren are going to do is they’re going to go up there and then they’re just going to screw them in. So, they’re just going to get a screw that’s long enough to get through the stud into the back of the panel. But, you don’t want to pierce the wood and, you know, have a nail in the foam part where a ball could hit it and split the vinyl. So, you got to find the exact screw measurement that’s going to get through your stud and then into the back of the panel without going through it. Are you going to screw Velcro into the studs basically or just the the wall? You’re thinking? Yeah. So, I think I’m going to put the Velcro on to match where it is on the panel and then I’ll staple it um kind of in. Okay. So, you staple the Velcro in and that allows you to attach these so they don’t come off. Nice. All right, guys. We are slowly but surely coming together. We have a few pieces that we couldn’t build with the wall panels until the very end, until we knew how everything fit. So, what we’re going to do now is build some of those last pieces. Now, I have a video that’s going to show you how to build these step by step. I’ll link that right now. Again, it’s a simple process, but it takes some time, takes a lot of staples, but it’s going to save you a ton of money. Now, here’s a little time lapse of what it looked like from start to finish. Here is the beginning, and here is the end when we finally finished attaching all the wall panels. Next, onto the impact screen. Guys, we have finally reached the last part of step one, the impact screen. We’re going to put this bad boy up, make it look nice and neat, and get us on our way. Now, attaching the impact screen is fairly easy. You take these ihooks, screw them into the wall 18 in apart, take bungees, tarp clips, and then just tarp clip them to the screen. If you have any overlap, just fold it over and tarp clip that part. But we’re not quite done yet because there’s one huge piece you need to pay attention for. And so, one of the biggest pieces, guys, is just to make sure that you have some overlap for your impact screen. So, I’ll overlay some B-roll right now, but essentially what we’re going to do is we’re going to put a wall panel that sticks out a little farther than this. And it’s going to hide the bungee, the tarp clip, and the impact screen so that the impact screen overlaps and you don’t have a gap with your impact screen where a ball could shoot through. Now, one thing we got to say in every video, guys, we had this whole elaborate story. We found these guys on Reddit that sell golf impact screens for like 50% off. It’s an insane deal. First time we did it, people were just like, “Oh yeah, just PayPal these guys and they’ll send it to you.” So we just like PayPal these random dudes. And then a few weeks later, Impact Screen showed up. So if you guys want the half off impact screen, not everyone knows about it, but we will send you the contact if you email us at [email protected]. Now, we finally finished the enclosure, so it is time for step two, the flooring. This part’s actually pretty simple, and you can get all the products in the description below. What you’re going to need is these 1-in interlocking foam tiles. These are basically puzzle pieces. So, you just put these together. And then you get your turf. You lay your turf down. I like to use carpet tape on the edges to help keep it in place. Then you cut the edge of the turf. And that’s pretty much it. But actually, it’s not. Pause. Hitting strip. We’ll show you how to do that as well. You want a different hitting strip material. That’s the expensive like inch thick turf. And then the regular turf. I mean, you’re not going to hit off it. So, you just want it to look nice. So, we got like a $1.50 a square foot turf for this build. Looks really nice. Can you putt on it? Yes. Is it perfect putting turf? No. If you want a little more expensive putting turf, you can go with that. But really, the most important part is that hitting strip. Yeah. And we’ll finish that out right now. All right. As we finish up step two with the turf and the flooring, we’re going to move on to step three. One of the most important steps, the launch monitor, the thing that is going to power your golf simulator. Now, if you’re interested in which one to get, we have a bunch of videos that go over our top five favorite ones, best budget ones, and I’ll link these here and down below in the description. But for this specific setup, we need to call in a little help. So, I’m going to call my friend Chris Reagan, who works at Play Better, and he’s going to recommend what launch monitor he thinks we should get for this situation. Hey, got a question for you. So, we’re building a golf simulator in my father-in-law’s garage. Looking for a device under probably $4,000. I’m wondering which one you think would be the best fit. We got enough width for lefties and righties. Um, but mostly going to be righties in this situation and just want to hear your thoughts. So, I was thinking about what you said. So, you’re looking for a launch monitor that’s under 4,000. Um, works well for left and right. And I know you had mentioned before that you’re going to be hitting a little closer to the screen. And so, that last one takes radar out of the mix. We’re going to have to um focus on the phototric. I mean, I think I got to go SkyRack Plus on this one. I mean, it has fantastic simulation. The data is just increasing every single time they uh release a new update, especially because they’re, you know, partnered with Golf Tech. So, it’s it’s hard to beat, honestly, for what you’re looking for. I think Sky Track Plus is the one. All right, guys. We’re going Sky Track Plus for Pops. Now, whatever launch monitor you decide to get, we can get it for you as cheap as possible if you use our discount codes and links in the description. All right, guys. At this point, we should be on to step four, the projector. But my father-in-law made one of the biggest mistakes you can make. And I know you viewers at home are not going to make the same mistake he made. So we’ll explain a little bit about what happened and how we fixed it. What was the key mistake Pops made in the projector? So the projector at a certain distance it gets wider and wider. So when dad if you kind of look up here the shot of it or whatever. So he just like wanted as close to the screen as possible, not checking the projector on how wide and how tall it can go on the picture. So So basically what Trent’s saying is every projector to fill a certain screen size. They all are different. It’s not like one sizefits-all. They all to fit, you know, let’s say his 14 ft of width here, it’s got to be a certain distance away, right? And he he essentially didn’t like check it before, right? So that’s right, Derek. I didn’t check it before, but like how do you how do you know? How do you know? Well, I think I I think I think before you put it up, you’re supposed to hold it, you know, up there and you’re supposed to like, you know, kind of check at, you know, at the certain, you know, the number of feet away. So, last time we were here, guys, we made a huge mistake. The projector where it sat basically a shadow a shadow would show on the screen. it. Basically, we had to hit a little closer to the screen so that you didn’t sky it up top there. So, we needed to switch up projectors. And that’s why we say it’s so important that you take the time to get the right projector. So, we’re going to link this one here. What we really like about this, it sits directly over the ball. Now, sometimes you would worry with projectors like, oh, I don’t want to hit it with my swing. But, if you are directly over top of where you’re hitting, since the swing is on an arc, you’re never going to have any issues. So, we’re good with the projector. We moved it close enough to now we don’t have to worry about hitting up top there. And then the last and final part that I really like here, no bumper on the bottom. And what we did is we took Velcro, put Velcro on the impact screen, velcro on the floor, and we velcroed this down. So it still has some give. It’s not going to be too tight where it ricochets back. But the big thing with this is now right when that hits, it’s going to stay tight right there. All right, guys. Last step, and one of the most important steps, the laptop. You’re going to want to spend at least $1,000 to get a high-quality laptop to be able to run those golf simulator programs. Because we have the Skyrack Plus, you could use a MacBook, but you already know we’re going with the gaming PC. Come on, check it out, guys. So, that is how to build a custom DIY simulator on a budget. If you guys need some help, email us at [email protected]. And if you guys want some discount codes, use our codes and links below.
Take Our Golf Sim Quiz to Find The Best Launch Monitor For You: https://www.playbetter.com/blogs/golf/find-the-best-golf-launch-monitor-simulator-for-your-game-with-jock-from-golfbusters/?ghref=11569%3A651919#quiz-RbHyqJ
All Links for Products Used in the Video + Discount Codes: https://docs.google.com/spreadsheets/d/1bY-dnvX3Wdz9PF0vuxIAh92_wCuLMAnnHAQqJpZoazc/edit?usp=sharing
In today’s video, we’ll show you how to build a custom dream home golf simulator on a budget in 5 easy steps. The goal of this video is to show you how to build your dream golf simulator as easily as possible and at the cheapest possible price.
$300 Off Golf Simulator Bundles w/ Code GolfBusters300:
Golf Simulator Studio Packages
PROSUMER LAUNCH MONITORS (DISCOUNT CODES UP TO $1000 OFF)
Garmin R50 Code GB100-JLKJME: https://www.playbetter.com/products/garmin-approach-r50-golf-launch-monitor-simulator?ghref=11569%3A651919
SkyTrak+ (Code GB100-JLKJME): https://www.playbetter.com/products/skytrak-plus-golf-launch-monitor-simulator?ghref=11569%3A651919
Foresight GC3 (Code GolfBusters10): https://www.playbetter.com/products/foresight-gc3-golf-launch-monitor-simulator?variant=42388530364581&ghref=11569%3A651919
Bushnell Launch Pro (Code GB100-JLKJME):
Bushnell Launch Pro Golf Launch Monitor & Simulator
BUDGET LAUNCH MONITORS (Under $1,000)
Rapsodo MLM2PRO (Code GolfBusters10): https://www.playbetter.com/products/rapsodo-mlm-2-pro-golf-launch-monitor-simulator?variant=43150354579621&ghref=11569%3A651919
Garmin R10 (Code GolfBusters10): https://www.playbetter.com/products/garmin-approach-r10-portable-launch-monitor-simulator?ghref=11569%3A651919
Swing Caddie SC4 (Code GolfBusters10): https://www.playbetter.com/products/swing-caddie-sc4-portable-golf-launch-monitor?ghref=11569%3A651919
COMMERCIAL GOLF SIMULATORS (Over $10,000)
Uneekor Products (The Golf Simulator we use) 5% Code GolfBusters10: https://www.playbetter.com/collections/golf-simulators?filter.p.vendor=Uneekor&ghref=11569%3A651919
Foresight Falcon $750 Off Code GolfBusters10: https://www.playbetter.com/products/foresight-falcon-golf-overhead-launch-monitor?_pos=1&_sid=974f79bdc&_ss=r&ghref=11569%3A651919
Email: GolfBustersOfficial@gmail.com
Join our Reddit Community!: https://www.reddit.com/r/GolfSimulatorDIY/
________________________________________________________________________
Flightscope, Bushnell, Full Swing, SkyTrak, Foresight, and Uneekor are companies that develop golf simulators aimed at helping both new and professional golfers improve their swings by providing real-time feedback and staying at the forefront of golf simulation technology.
The Best Golf Shoes We’ve Ever Owned:
https://amzn.to/3ZbxBJI
DIY Turf Strip: https://www.youtube.com/watch?v=MLkNTk5ftGQ&ab_channel=GolfBusters
Custom Wall Panels: https://www.youtube.com/watch?v=AWXE316klaA&t=1s
Some of the links above are for affiliates. I may receive a commission for you signing up for the platform.
#golfsimulator #diy #budget
Time Stamps:
00:00 –


7 Comments
SkyTrak+ (Golf Simulator Used in the Video) $100 off Code GB100-JLKJME: https://www.playbetter.com/collections/golf-simulators?filter.p.vendor=SkyTrak&ghref=11569%3A651919
Get the Golf Simulator We Use in our personal simulator 5% off Code Golfbusters10: https://www.playbetter.com/collections/golf-simulators?filter.p.vendor=Uneekor&ghref=11569%3A651919
Love your video nice on
Love you guys, great vids, you will reach scratch, keep grinding👍🏻
What size is that building? I'm in the process of building a garage. I think I am building 28×36 for multi purpose including a nice golf sim
What was the total price for this build? Need to do an r50 for myself
Great video…
I have dimensions very similar yours. 14.5 feet wide and 10 feet height and a lot of depth.
You mentioned about overlap impact screen on the sides. Can you elaborate on that please? How did you tuck the screen on the sides? Do you have Velcro there as well? Or did you use Bungees? A picture or small video of that area be very helpful.
I watched last few seconds of the video and I see that balls bounce back but it seems to be safe. Any issues there?
And how about putting? Your experience with this turf for putting.
Thanks in advance
The sim looks great but the screen is way too close. First hit and the dude nearly took a rebounded driver to the chin.