Most golfers head to the driving range and just rake-and-hit balls — but if you’re a mid-handicap golfer (10–20 handicap) or a high-handicap golfer trying to break 100, 90, or even 80, that’s one of the biggest mistakes you can make. In this video, I’ll show you exactly how to practice at the range so it actually translates to lower scores on the golf course.
This isn’t about hitting a bucket of balls mindlessly — it’s about building a range routine that makes your practice more effective, fun, and realistic. Whether you’re working full-time, juggling family life, or just want to make the most of your limited golf practice time, these tips will help you see real improvement.
In this video I’ll cover:
Why traditional range practice doesn’t carry over to the course
A simple routine you can use to practice smarter (not harder)
How to mix fun challenges with skill-building drills
What mid-handicap golfers should focus on to drop strokes fast
Affordable, everyday strategies to practice with purpose
If you’re tired of hitting it great on the range but struggling when it matters, this video is for you.
🎥 On this channel (Cameron O’Neal Golf), I share the relatable mid-handicap golf journey: authentic rounds, breaking 90/80 attempts, family golf, scrambles, budget-friendly gear reviews, and practice strategies that fit into a busy life. Golf doesn’t have to be intimidating or expensive — it can be fun, social, and full of progress you can actually feel.
👉 If you’re an everyday golfer who loves the game and wants to improve without needing to be perfect, hit that subscribe button and join the journey!
– Get 20% off your first year of Shot Pattern: http://bit.ly/4lQuK4n
🔔 Subscribe to follow the grind and see how far one amateur can go without quitting his day job.
📍 Based in NC
📧 Business inquiries: c.onealgolf@gmail.com
TIMESTAMPS:
00:00 – Intro
00:43 – Part 1: Warm Up
01:38 – Part 2: Block Practice
03:44 – Part 3: Wedges
04:53 – Part 4: Play Golf
06:15 – Part 5: The Poor Man’s Speed Training Method
08:20 – Outro
#Golf #DrivingRangeTips #MidHandicapGolf #GolfPractice #Breaking90 #Breaking80 #EverydayGolfer
If you’re tired of your range game
not showing up on the golf course, or if you’re like me and don’t have the time or
the budget for six driving range sessions a week, this video should help with that. I’m going to
show you the five-part driving range session strategy that I use that has helped me lower my
handicap by 18 strokes in a little over a year. First and foremost, gone are the days of getting
the jumbo bucket. We have a bucket of 80 balls here. The reason why is we want to make every
single shot count. If you have too many balls, you’re either (a) going to hurt yourself or
(b) you’re not going to learn anything from your golf practice. Trust me, I used to get the
jumbo bucket, and when I would hit a bad shot, I would just panic scrape and not really work on
anything. I would just try to hit a “good” shot. We’re going to stick to our
process and split these balls up into five groups and really get
the most out of every single shot. Part One is all about the warm-up, and this
is super critical. This is where you take time to get stretched, not just hit balls.
Once you get stretched and a little loose, then we’re going to take—just for this
section—five to ten shots. I’m going to do five for this purpose. We’re just going
to take something like a pitching wedge, something easy to hit, and just hit five balls.
During this segment, I don’t want you to care what the ball is doing. The purpose of a warm-up
is to get warmed up. Don’t care where the ball goes. You can observe the feedback, but the
purpose is just to get the blood flowing, get loose, because trust me, by the end of the
driving range session, you’re going to need it. And sometimes you hit shanks like that—and that’s
okay because it’s a warm-up. We don’t care. Part Two is where we do block practice. This is
where you spend time working on a specific issue in your swing, implementing a swing change, or
just working on skill-building drills. For this portion, you’re going to need an alignment
stick, or you can use a club. Pick a target, and that is the only target we’re going
to be hitting these next 20 balls at. For me, I’m struggling with fundamental issues
right now, like face control and ground strike. So, I’m going to be using Dr. Scholl’s foot
spray on something like my 4-iron because I want to make golf practice hard and just try
to work the ball different ways. For you, if you want to make it a little bit easier,
you can use something like a 7-iron here. It depends on what you’re working on. For me, I can’t
implement a swing change if I am swinging at full speed, so I’m going to make a nice half-swing.
The goal for this portion is to just go slow. That one was a little bit higher on
the face, but that’s a good strike. What are you working on? Let me know in the
comments. Maybe it’s a takeaway feel. Maybe your hands are too inside and you’re working
on getting them more outside. Whatever it is, I recommend going slow and just using this
time to really ingrain that new swing feel. At the end of the day, this is also going
to scale based on where your game is right now. If you’re a complete beginner, maybe
you just want to work on fundamentals like checking your alignment, your grip, or
your tempo. If you’re battling a slice, try to hit a hook. If you’re battling a
hook, try to hit a slice. You want to use these 20 balls to really ingrain those
new motor patterns and swing mechanics. Before we head into Part Three,
if you found this video helpful, consider liking and subscribing so that YouTube
can show it to more golfers who need help. Part Three is all about wedges. They say amateurs
need to get really good from 100 yards and in. So, we’re going to do away with alignment sticks
because you can’t use those on the golf course. It’s super simple: pick a target, pick a
wedge, and try to get it as close to that target as possible. The rule is you have to pick
a new club and a new target every single shot. This is also where we start simulating on-course
golf situations. Instead of getting mad, go through your full routine. When you hit the
shot, don’t react—just observe. How was the ground strike? How was the ball flight? How
was contact? And then use that as feedback. Part Four is 25 more balls, and we’re
going to be playing golf on the driving range. The idea is to pick your par. For
example, let’s say we’re playing a par 5. We pick a target like a window, and as
long as the ball finishes in that window, we’re good. Then we’ll simulate the next shot from
the fairway or the rough and rinse and repeat. So for example, I’m going to play a
par 5 that’s pretty long right now. My target is going to be the “Landscape and
Smokehouse” sign. If the ball finishes within the edges of those signs, that’s a good
drive. For this, you want to go through your full routine and just like with the
wedge practice, when you hit your shot, observe it. Don’t react. How was contact?
Did it finish where you wanted it to? That one finished maybe 30 yards left
of the edge of the Landscape sign, so we’d technically be in the rough. For
this next shot on the par 5, I’ll take a 5-iron and try to get it out of the rough
and as close to the green as I can. Let’s say we’re still 280 out. Now my target is
going to be that Barber sign over there. Out of the rough, that was not a
good shot—but that’s the whole point. Part Five is going to be a fun one. Let’s
say you hit five balls for warm-up. That should leave you with about five
balls left. What we’re going to do with those is called the “poor man’s
speed training” method. Obviously, you’d want a radar or launch monitor for feedback,
but since we’re broke, we don’t have that. The goal is to just take those five balls and
hit them as hard as you can with the driver. Don’t worry about what your body is doing. Don’t
worry about ball flight. Just try to make the clubface connect with the back of the ball as
fast and as hard as you can. What this does is bring up your normal cruising speed. So if you
normally swing your driver at 140 miles per hour, doing this over time will bring that
cruising speed up—140 will turn into 145. It’s super important to note: you need to do
this at the end. Why? Because by then you’re already warmed up, the blood is flowing, the
muscles are relaxed. If you try this at the start of your driving range session, you run a
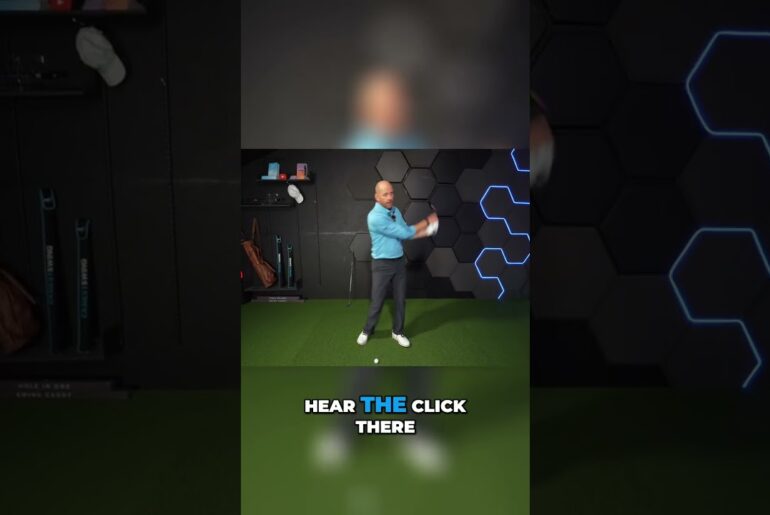
higher risk of injury—and you don’t want that. So just swing as hard as you can. Don’t care where it goes. Do about five of these—or
however many balls you have left. Now, I wouldn’t recommend swinging that hard on
the course, but it brings up your cruising speed. So, for example, after doing these, you might go
back to your on-course swing at about 80% effort. And I actually toed that one
high on the face—and that’s okay. It’s also worth mentioning that
if you were frustrated at any point during this five-part driving range session, the poor man’s speed training drill is
the best time to let out that frustration. So—how are your range sessions? Did you
find any of these parts helpful? And if so, which one are you going to try first? Let
me know down in the comments. Otherwise, if you want to see the nine-hole scramble video I
did with my dad, you can check that out up here. Thank you so much for watching. Don’t forget to
like and subscribe, and I’ll see you next time.


1 Comment
What’s the ONE thing you always try to work on at the driving range? Lately I’ve been focused on tempo and consistent ball striking. Share your best golf practice tip below 👇 — curious what other golfers are working on!