
")
You don’t need a $10,000 setup to enjoy a true indoor golf simulator.
With just three core components—a launch monitor, a hitting net, and a hitting mat—you can put together a reliable and fun system for under $2,000.
Below are two proven builds: one built around the Garmin Approach R10 and another using the Rapsodo MLM2PRO.
Both options deliver accurate data, easy setup, and year-round playability.
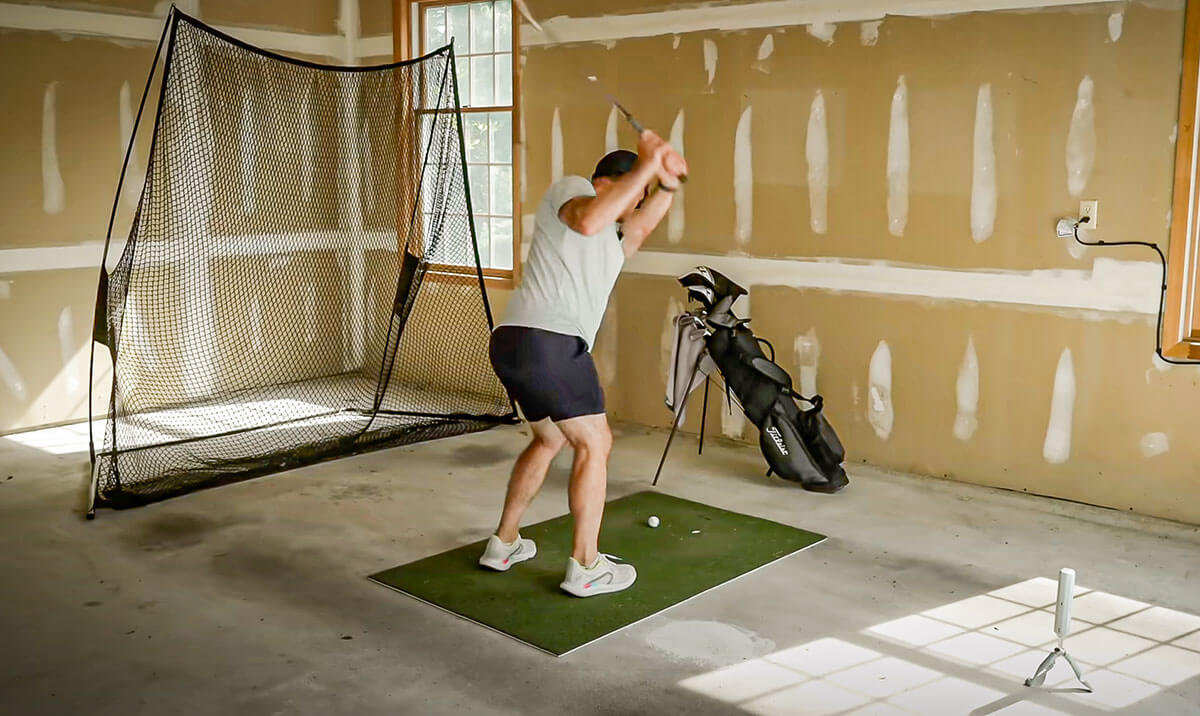
Space Requirements & Room Needs — Quick Check
Before buying, make sure your room is ready.
You’ll want ceilings of at least 8.5 to 9 feet, about 12–15 feet of depth, and 8–10 feet of width. That gives you enough space to swing comfortably and allows the launch monitor to read shots correctly.
For most people, an empty garage bay is usually the perfect spot to fit a home golf simulator.
Simulator Build Option #1: “R10 Range Pro”
The Garmin Approach R10 is one of the most popular entry-level launch monitors for a reason. It provides a wide range of data points—carry distance, launch angle, ball speed, and even estimated club metrics—at a price that leaves plenty of room in your budget for a quality net and mat.
Paired with the Net Return V2 and a durable hitting mat, this build delivers reliable practice indoors or out without breaking the bank.
Item
Link
Price Estimate
Garmin Approach R10 Launch Monitor
Link
$500–$600
Net Return V2 Golf Net
Link
$595
Fiberbuilt or HotShot Hitting Mat
Link
$200–$350
Estimated Total: $1,300–$1,600
Simulator Build Option #2: “MLM2PRO Video Studio”
If you love visual feedback, the Rapsodo MLM2PRO is the upgrade pick. With its dual-camera system, you get not only shot data but also video replays with shot tracing—perfect for working on swing mechanics.
Combine it with the same Net Return V2 and hitting mat and you’ve got a setup that blends practice and entertainment without going over budget.
Item
Link
Price Estimate
Rapsodo MLM2PRO Launch Monitor
Link
$700–$800
Net Return V2 Golf Net
Link
$595
Fiberbuilt or HotShot Hitting Mat
Link
$200–$350
Estimated Total: $1,500–$1,900
Setup Tips
Both builds are easy to install. Place your mat 7–9 feet in front of the net, then position the launch monitor behind the ball as instructed (6–8 feet for the R10, closer for the MLM2PRO with its app overlay).

Make sure lighting is even, aim the monitor correctly at the net’s center, and you’re good to go. You’ll have a functional practice bay in less than an hour.
FAQ: Building a Budget Golf Simulator
Do I need a projector or impact screen?
No. To stay under $2,000, the best approach is using a net and view your data on a phone, tablet, or mirrored to a TV. You can always add a screen and projector later.
Are these launch monitors accurate enough?
Yes. The Garmin R10 and Rapsodo MLM2PRO are widely used by recreational golfers and even teaching pros for data feedback. They’re not $20,000 TrackMans, but they’re more than good enough for practice and simulation play.
How much space do I really need?
Plan on at least 8.5–9 ft ceilings, 12–15 ft of depth, and 8–10 ft of width. Drivers especially need that clearance, so measure carefully.
Can I play simulated courses with these?
Yes. Both units provide golf course simulation however some may require additional subscriptions for that functionality.
Which build should I choose?
Pick the R10 build if you want the lowest price and reliable practice data. Go with the MLM2PRO build if you value video feedback and visual shot tracing.